>

Triple Goodness: Pears Soap, Passier Lederbalsam, Leather 'N' Rich

September 15, 2018
After recently pilfering my mom's tack room, I returned with some of forgotten treasures in need of a little attention, restoration and rehab.

Seeing a heap of leather that needs cleaning and conditioning can seem overwhelming, but if you attack the pieces a little at a time, it will get done. You figure, maybe a half hour a night while watching television or listening to a podcast as a distraction, the task doesn't seem as daunting.

One piece in particular, an old tooled breast collar with some sterling trim, was particularly neglected. The back side was dry, cracking, and had layer upon layer of old sweat and dander.

Heavy duty dirt, sweat, and superficial cracking of the breast collar leather required deep cleaning.
No, this is not a job for something generic like Leather New, although in the case of neglect, anything - even Leather New - is better than nothing. To get the deep down dirt off and clean out all the little cracks and crevices, I reached for my go-to handy, dandy, baby-soft toothbrush and Pears soap.

After getting the leather good and wet with lukewarm water in the sink, I very gently scrubbed with Pears soap, rinsing each area thoroughly afterwards. A tack sponge would work almost as well as my softie toothbrush, but I wanted to be sure I got in between the tooling and the multitude of cracks that had developed to remove every last trace of filth.

Pears Cuts Through Horse Dander
Pears soap, water, a soft toothbrush, microfiber rag and your fingers can remove sweat and grime from dirty leather. Care must be taken when leather is wet to avoid scratching or stretching.
Trust me, mud came off with the consistency of shaving cream. Pears soap and water really cleans!

Time cleaning: 10 minutes.

After the leather was rinsed clean, I patted dry with a towel and put down an extremely light coat of Passier Lederbalsam with my fingers. It's been my experience that distressed leather can sometimes dry to an almost nubuck texture after being wet and "supercleaned," and the Lederbalsam seems to keep the grain tighter and smoother as it dries.

Passier Lederbalsam
Pat dry, light coat of Passier Lederbalsam: 5 minutes.

I left the breast collar to dry flat on a towel overnight, then rubbed a total of three coats of Lederbalsam in by hand, both front and back side, allowing each coat to penetrate completely and wiping with a soft cloth between coats.

The back side of the breast collar absorbed the first coat of Lederbalsam in record time. Cleaning the leather thoroughly beforehand removed damaging dirt and sweat and allowed the conditioner to penetrate deeply.

After just one application of Passier Lederbalsam, the tooled side of the leather is already beginning to appear moisturized, supple, and the color restored.
Three coats of Lederbalsam, buffing in between: 15 minutes.

The conditioning effects of Passier Lederbalsam are legendary, and the breast collar was no exception. The leather had become supple, richly colored, and the areas with previous cracking much more flexible and nourished feeling. While no leather conditioner can repair cracked leather, conditioned leather is much stronger and less prone to additional cracking and damage. Particularly with vintage leather, keeping the leather conditioned is paramount to its longevity.

After 3 applications of Passier Lederbalsam, the leather became supple and glowed with the effects of a thorough conditioning.
The breast collar had a very natural low gloss from the Lederbalsam, but I know after a day or so the finish tends to revert to matte. To enhance the tooling and preserve the appearance, I broke out my secret weapon: Blackrock Leather 'N' Rich.

When I want something to look fancy, fancy, fancy, but don't want the more artificial appearance of a topcoat or wax, Blackrock Leather 'N' Rich performs like no other.

Blackrock Leather 'N' Rich gives a nice sheen to fine leather, enhancing its natural colors with an almost HD effect.
Certainly, Blackrock can be a little tricky to use. It takes a bit of finesse to get the right effect and can work against you if used incorrectly, but it delivers results nothing short of amazing. When people ask how I make my collection pieces look so good, or how to make their "good" tack look brilliant, I enthusiastically recommend Blackrock. And trust me, if it didn't work, I'd use something else. I have zero loyalty to products that don't perform.

Blackrock is sticky, and a little goes a long way. For this reason, I only apply with my fingertips, and very lightly at that. Even the thinnest coat over already-conditioned leather is sufficient. Once I've rubbed it in, I step back and leave it alone.

I've learned the hard way - don't touch! No soft towels. No buffing. Nothing.

When it no longer appears wet, I'll rub over the surface with my fingertips to smooth the finish and enhance the gloss, and that's it. I'm done.

Blackrock finish time: 10 minutes.

If applied correctly, there's no excess sticky residue, and Leather 'N' Rich will give a long-lasting finish that looks like you just cleaned and conditioned your leather, even months later. It enhances the natural colors of leather to such a degree it's like viewing in high definition. Best of all, you haven't smothered your leather in an acrylic or wax that makes future cleaning or conditioning difficult.

Blackrock Leather 'N' Rich over conditioned leather gives a piece that extra something-something that gives ordinary vintage tack a museum-quality finish that lasts. You can even see the outline of the silver reflected in the leather surrounding it.
Absolutely beautiful. Perfection. "I'm ready for my closeup, Mr. DeMille."

Before: Sad.  /  After: Glowing. A little time well spent.

It took just over 30 minutes total to clean, condition, and make the tired old breast collar sexy again. That's one sitcom or a podcast-worth of time, but what a payoff.

The Beautification of Ugly Betty, Part 1

September 06, 2018
If you read the previous post about my saddle day trip, you know I got a used saddle for my mom I named Ugly Betty. Why? Because Betty is straight up ugly.

Saddles can tell you a story, or a lot of stories. I think Betty's goes something like she was the victim of a vicious divorce, where the opposing spouses were instructed by a court-appointed therapist to relinquish their cutlery and firearms and take out their frustrations on an inanimate object. One spilled soda pop on the fleece, the other turned her over and doused her with a chocolate shake. They took turns dropping her and stomping her in the dirt, then one threw dye on her to up the ante. When the divorce was final and they hugged out their differences, they sprayed lacquer up one side and down the other to symbolically entomb all the bitterness they'd moved past. In the end, Betty was carelessly cast aside like a dread trigger object as each chose their path toward a new life.

Or something like that.

Betty had suffered, that was evident. No saddle, not even a model I don't like, deserves that kind of treatment. I'm pretty sure when Saddlesmith took Betty off the bench and boxed her up to meet her future, they never anticipated just how much misfortune lay ahead, or how much abuse a little ole production model like Betty could endure.

It's like the tale of Black Beauty, but with a saddle.

All the dirt and filth was sealed under a haphazardly applied layer of lacquer, making it nearly impenetrable. This is an area just above the rigging.
Betty's safe now, and will once again be beautiful, but it's going to be a hard-fought battle to bring her back.

On the plus side:
  1. There is very little actual damage to the leather, it's virtually all cosmetic
  2. The tree feels and sits solid
  3. Most all the stitching is intact, save for typical wear areas on any saddle
  4. It doesn't need refleecing
  5. The seat is fully intact
  6. There is plenty of adjustment in the fenders, they go quite short for smaller riders like my mom
  7. New latigos on both sides
  8. Nothing wrong with the stirrups
  9. None of the silver plated concho tips are missing

Betty's roughout seat was every bit inviting as a Honey Bucket. No thank you!
On the minus side:
  1. All the lacquer needs to be removed before the dirt will come off
  2. The dirt is substantial - more than I've ever seen on any saddle
  3. Dirt is deeply embedded in the basket stamping, which means a lot of detail work with a soft toothbrush 
  4. Bad dye job attempts are irreversible, it cannot return to its original mahogany color 
  5. The seat is stained so badly it will need to be dyed
  6. Fleece is matted hard and absolutely filthy
  7. Blevins buckles on fenders corroded so badly the prongs have broken off and need replacing
  8. Missing a concho - they all need replacing because of tarnish and flaking of silverplate
  9. Skewed skirts need to be reshaped and set
Before anything can proceed, Betty needs to be cleaned from stem to stern. This is not going to be a simple once-over with Pears Soap or generic leather cleaner; Betty requires industrial cleaning.

Sometimes, you have to be cruel to be kind. Betty was hardcore filthy - so filthy she made my skin crawl. This calls for super strength cleaning products not normally associated with cleaning leather.
My industrial cleaning kit includes a bucket, Dawn dishwashing detergent, a couple drops of chlorine bleach, a microfiber scrubbing mitt, a soft toothbrush, a spray bottle, and a super strength sprayer on the garden hose.

Yes, I said garden hose.

I have to wash Betty similar to how you'd wash a car or a filthy horse: lots of water, lots of cleaning product, and lots of scrubbing and rinsing. There's no way around it.

Betty's fleece has been packed down so hard for so long with so many different substances soaked in, it would not even scratch up fluffy with fingernails, and spraying with the hose alone did nothing to release it. The fleece was like hideous old carpet, and I was not completely sure it could be salvaged.

The synthetic fleece underneath actually photographed much better than it really was. It was matted hard to the tree and skirting, and saturated with mystery filth.
I ended up loosening the fleece with fingernails while the hose was directed at full blast, working in Dawn mixed with extremely diluted bleach to suds up and kill any cooties. This went extremely slow, inch by inch, until the fleece allowed the cleaning product to work all the way through.

Mud poured out of the fleece in frothy waves for several minutes. I probably rinsed through the fleece for 10-15 minutes afterwards to make sure there was no trace of product remaining.

Even with the nice summer weather, I knew it would take Betty a few days to completely dry underneath. Fortunately, I have a slatted saddle rack that would allow air flow to the fleece and still provide a horse-shaped form to prevent the skirts from warping as it dried.

I put Betty on the slatted rack in the shade to dry to avoid any further spotting and hardening of the leather. At night, Betty got covered up with a lightweight blanket to prevent dew from saturating the leather. Betty was tended like a pet parakeet, covered and uncovered.

Every day, for a several days, I'd take Betty off the rack periodically and rough up the fleece as it dried. I wanted to be sure the fleece would not compress against the slats, plus keep the air flowing all the way through.

Betty's fleece looked, smelled, and felt remarkably better after a thorough shampoo and dry.
I feel the synthetic fleece has recovered enough to provide the protection it was intended. At some point it will need replacing, but the fleece on any western saddle isn't eternal. For now, Betty's undercarriage is looking fab!

Because the saddle leather is so filthy under that lacquered surface, cleaning each section has been an arduous task. First, water. Once it's good and wet, then carefully scrubbing with diluted Dawn and a very soft baby toothbrush. Only when the surface dirt is gone can I follow up with deglazer to remove the remaining lacquer, then attack all the dirt that was sealed under the lacquer.

A preview of things to come: the right rear skirts are mostly clean. Compare to the dirt-encrusted seat jockey area on the right.
Betty has a long way to go, but I'm delighted how she's responded to even nominal TLC. This is by no means a one or two day rehab, but her future looks brighter every day.

Betty will be a swan again.

Daytrippin' for Diamonds in the Rough

September 03, 2018
Saturday I went on a rescue mission. Not in the noble sense, but in the saddle sense. I went to take a look at a couple saddles in need of rescue and rehab, and made a day trip of it.

I have to admit, I have more fun on these day trip saddle excursions than anyone. I get to see new places, explore the countryside and meet people with interesting stories.

To start, I map all my saddle stops out on my phone, get a good playlist loaded, grab some coffee, gas up, and I'm off for adventure. Other than my scheduled stops, I play it by ear.  If I see a neat little roadside restaurant, that's where I eat. If I pass an estate sale that looks interesting, I stop. By the end of the day I've likely made some great memories and discovered some new favorite haunts.

More fun than a barrel of monkeys, it is.

The first saddle on my agenda was an old roper I saw on Facebook Marketplace. Really, not much to look at, but I had the feeling it was a diamond in the rough. Really rough, at that, but still a diamond.

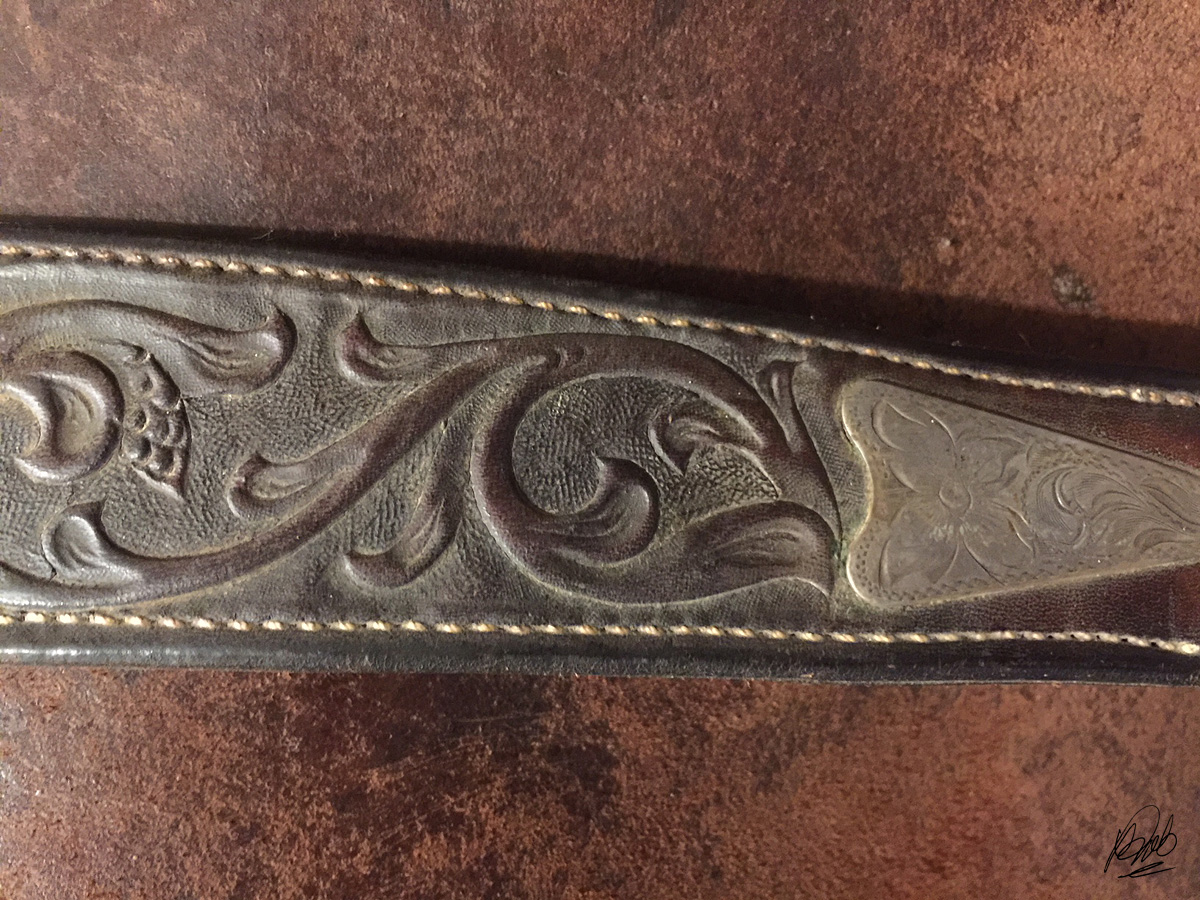
Sometimes listing photos leave a lot to be desired, and a lot to the imagination. It pays to be able to identify what you're looking at despite how they're presented by the seller. For anyone with OCD, you have to accept you don't control the photos the seller takes. The photo you need ain't the photo you'll get. It is what it is. Use your best guess, go with your gut. Roll with it.
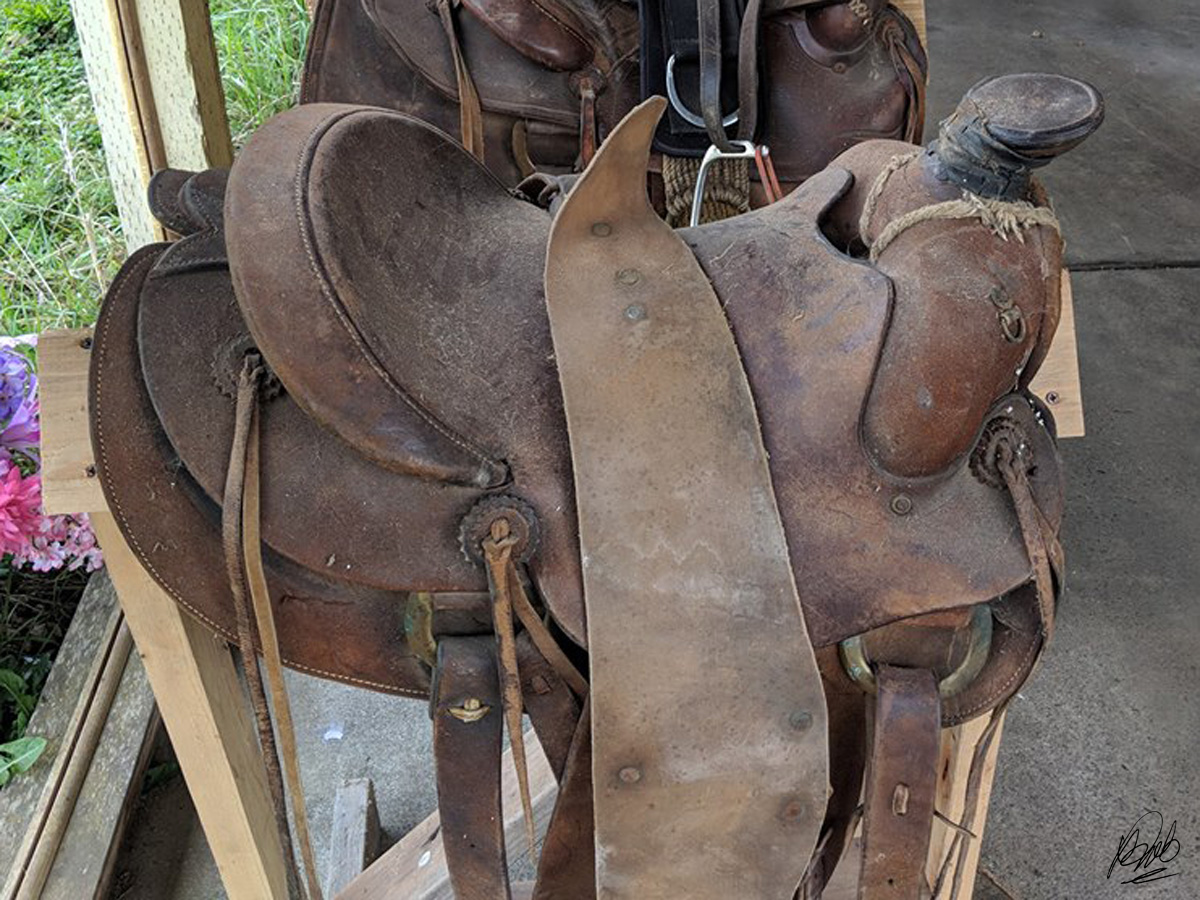
To the casual, not-saddle-savvy observer, they might see a dusty old piece of leather not worth bothering with, and certainly not exciting. What did I see from the ad? A darling old roughout roper with the pelican horn I love. Being a roper, likely an adult-size seat and probably a decent gullet width and bar spread that would fit modern day horses. I could make out the saddle had brass hardware and the cantle wasn't warped, so the basics were there. Though not evident by the photos, I could assume the fleece would need replacing $$$, it would need new saddle strings $$, and might need some work on the rigging $$. Definitely worth a look-see.

Why, you ask?

If everything about the saddle checked out, it meant I just found my new, punchy, ranch riding class saddle.

Was it a new Bob's or Jeff Smith or Harris ranch rider? Absolutely not, but that's not what I was looking for. Was it a maker-marked Wade from the shop of some mustaschio'd buckaroo? Again, not on my radar.

No, this was a late 60's Western Horseman readin', amber glass ashtray smokin', cheatin' heart songs on the jukebox, steak night at the roadhouse, whiskey drinkin', pickup truck drivin', round skirt roper. Authentic as hell. Exactly what I was looking for.

If you were born after 1980, you probably have no idea what I'm even talking about, but trust me, it's what I was looking for.

The old roper was in East Olympia, an area I'm unfamiliar. I got there by way of the main drag through Rainier, turned on Minnesota Street N, and headed out on Rainier Road SE to Fir Tree Road (becomes 89th Avenue SE), from 89th Avenue SE to Rich Road, to places I haven't been and things I haven't seen before. Did I mention how much I love these day trips? This is why.

Along the way, I passed award-winning Lattin's Country Cider Mill. Here I was, seemingly in the middle of nowhere, and that place was an obvious hotspot of activity. Granted, it was a beautiful sunny day, but I was still surprised how many people were there. Apparently, they have a fall festival and are open through the winter too. I can't wait to return to the area and visit when I have more time and fewer saddles to rescue.

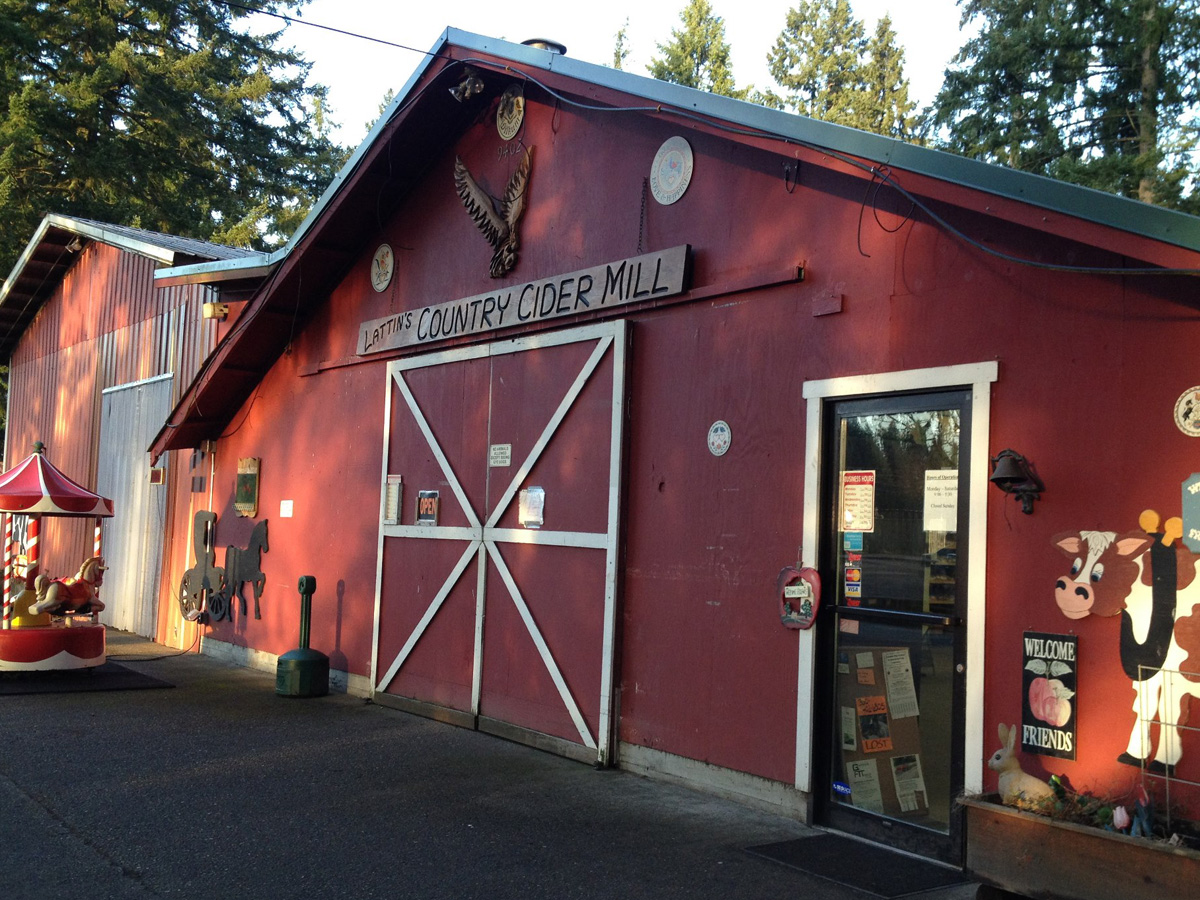
Lattin's Country Cider Mill. Another gem I found by accident in my saddle travels.
I arrived at "the saddle place" and saw the old roper in the flesh for the first time. Yup, it was just what I thought it would be, right down to needing new fleece. Delighted, "Punchy" became my saddle. Bonus: Punchy came with his own saddle rack, gratis. One more reason I take my Astro van on these day tours. You can always make room for unexpected treasures.

On my way from the old roper saddle stop, I somehow got turned around the wrong way on Rich Road, which southward becomes Old Hiway 99, and passed a sign for Nelson Ranch, which I later learned was one of Washington State's Centennial Farms. This was not just a ranch sign, but a sign for a ranch having a ranch dinner! I was all set to return later that evening and dine on the prairie, but the dinner had been the weekend before. Dang!

From East Olympia I traced my way back to Rainier, and stopped to consider my plans for the rest of the day. I knew I had to travel across the Narrows Bridge to Belfair to look at a saddle for my mom, but I'd passed so many garage sale signs on my way to the first saddle I decided to hit a few before I headed north.

After picking up Punchy, I was really on an estate sale quest to find the perfect amber glass ashtray to commemorate the occasion (as long as it was $1 or less), but after several stops came up empty. Undaunted, I continued my course to cross the Narrows Bridge.

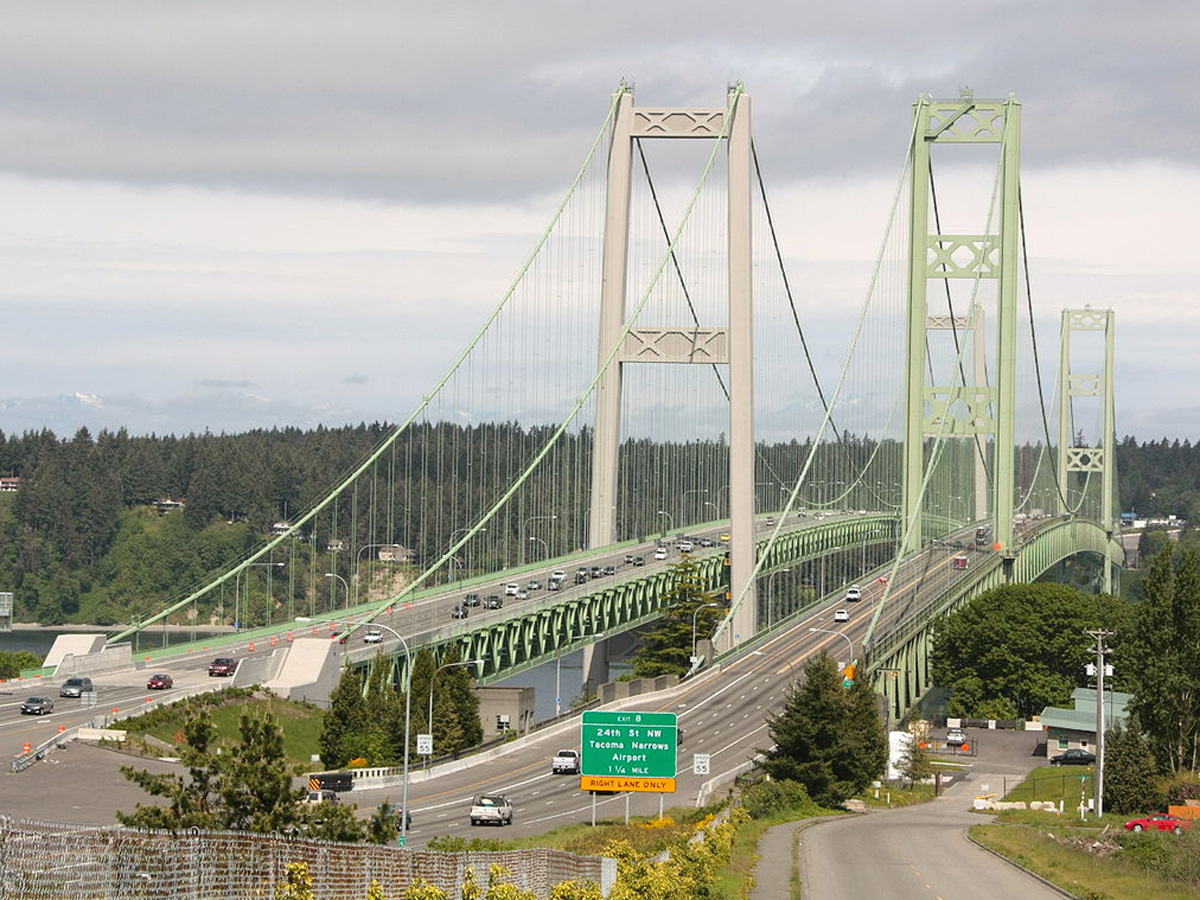
Galloping Gertie herself. I happen to have a bridge crossing phobia, but when on a quest you gotta do what you gotta do.
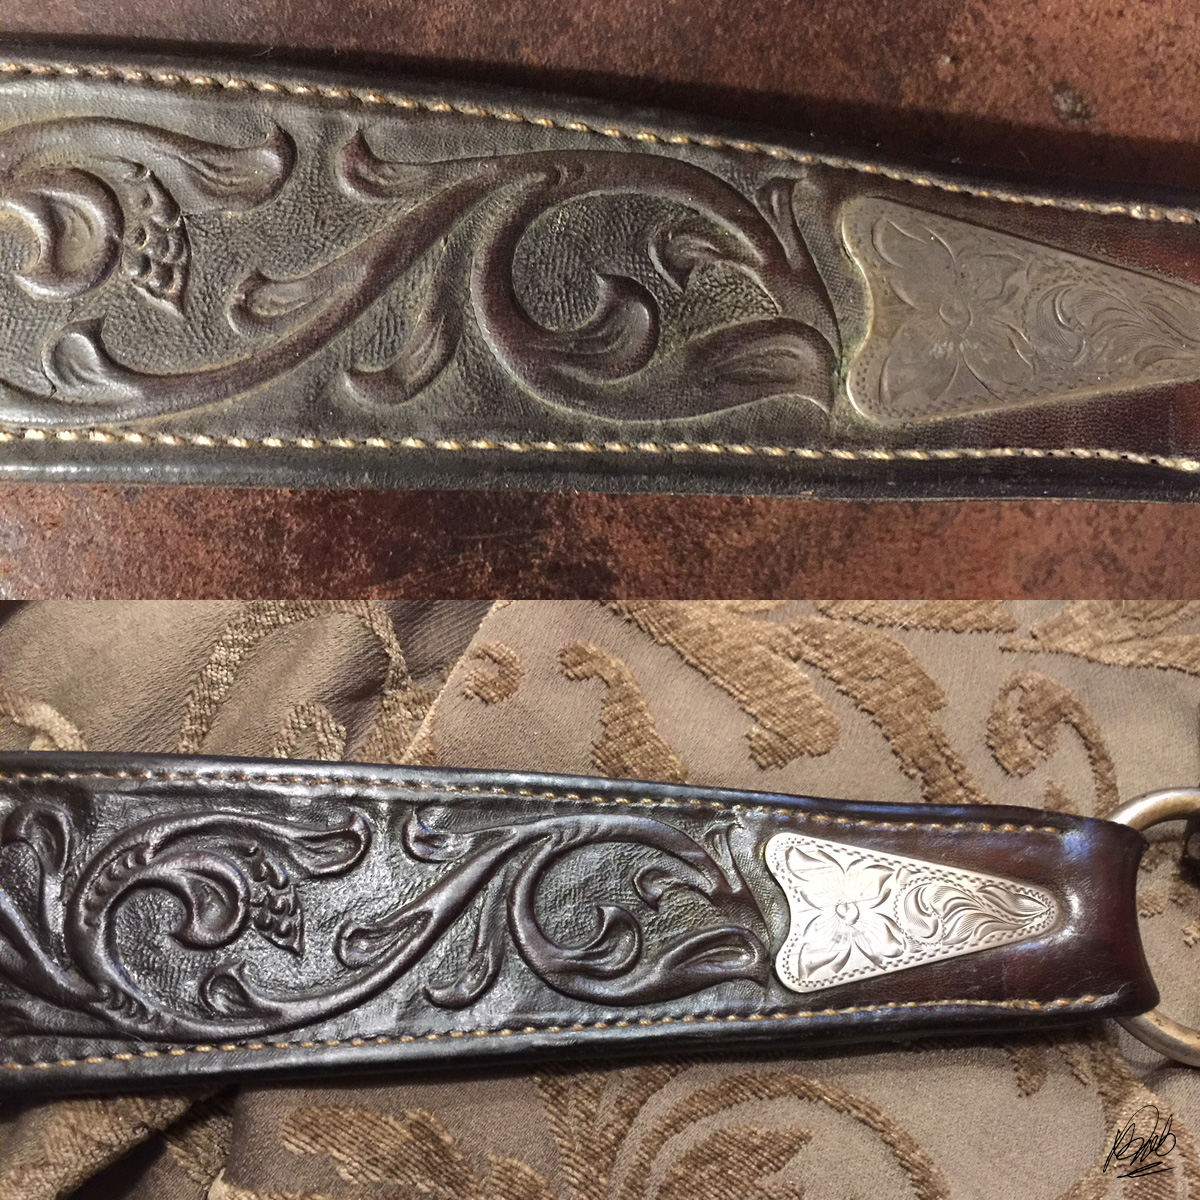
The saddle in Belfair was another Facebook Marketplace discovery with a terribly vague and unflattering listing photo. What I could see, however, was the saddle was easily identified as a Saddlesmith Bob Loomis Reiner.

This poorly staged critter was simply represented as "vintage" and "all leather." To the trained eye, it's a Saddlesmith Bob Loomis Reiner that has seen much, much better days. Rode hard and put away wet is an understatement.
Truthfully, I've never been any kind of fan of the Saddlesmith Bob Loomis Reiner, but it's apparently my mom's Holy Grail saddle. She's been using my 16" Billy Cook Classic Pro Reiner for awhile now, hates it, says the seat's too big and it's too heavy (it is), she wants the stirrups to be able to go even shorter (they won't), but absolutely loved the little Bob Loomis Reiner of a friend's she rode in. That's what she wanted, and that's what she was getting. Essentially, I would get the saddle I like back, and she would get the saddle I dislike. Sounded like a fair trade to me.

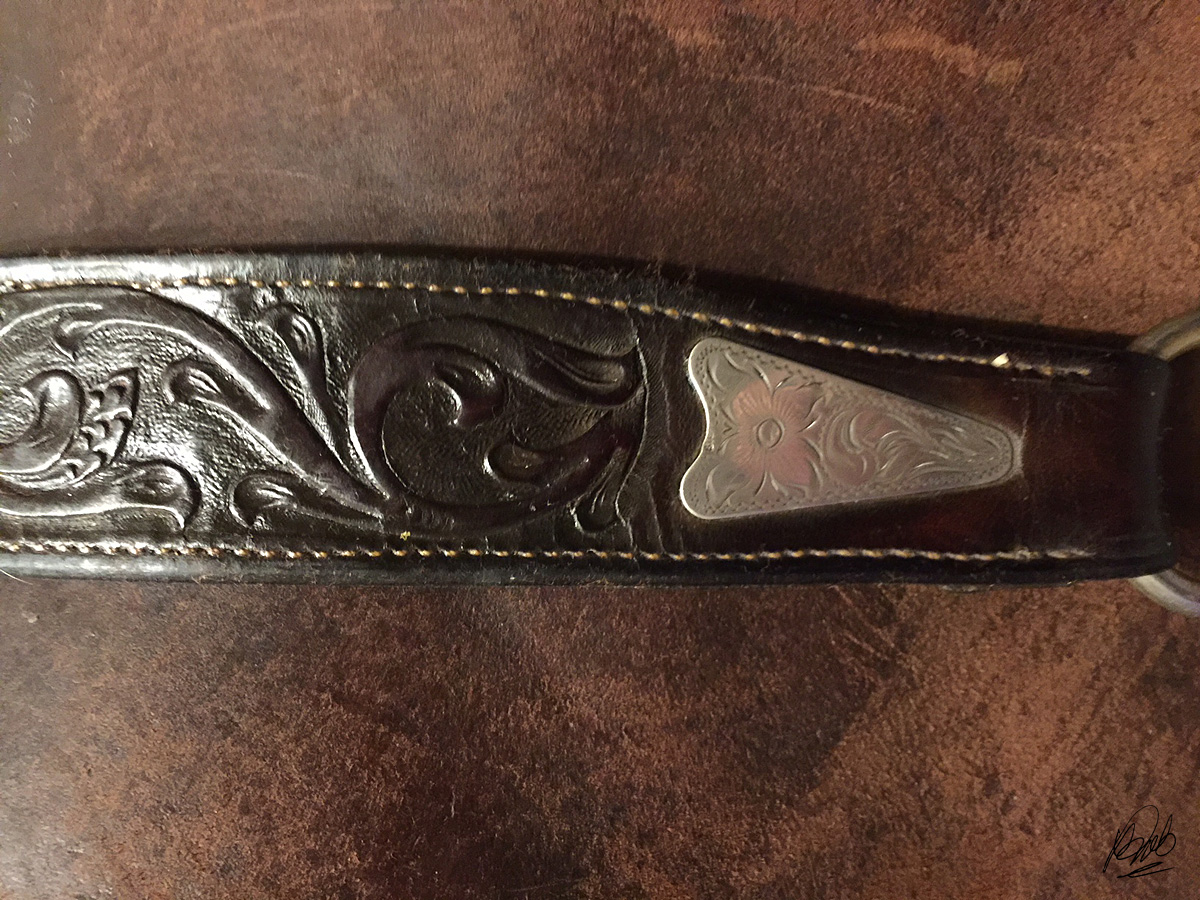
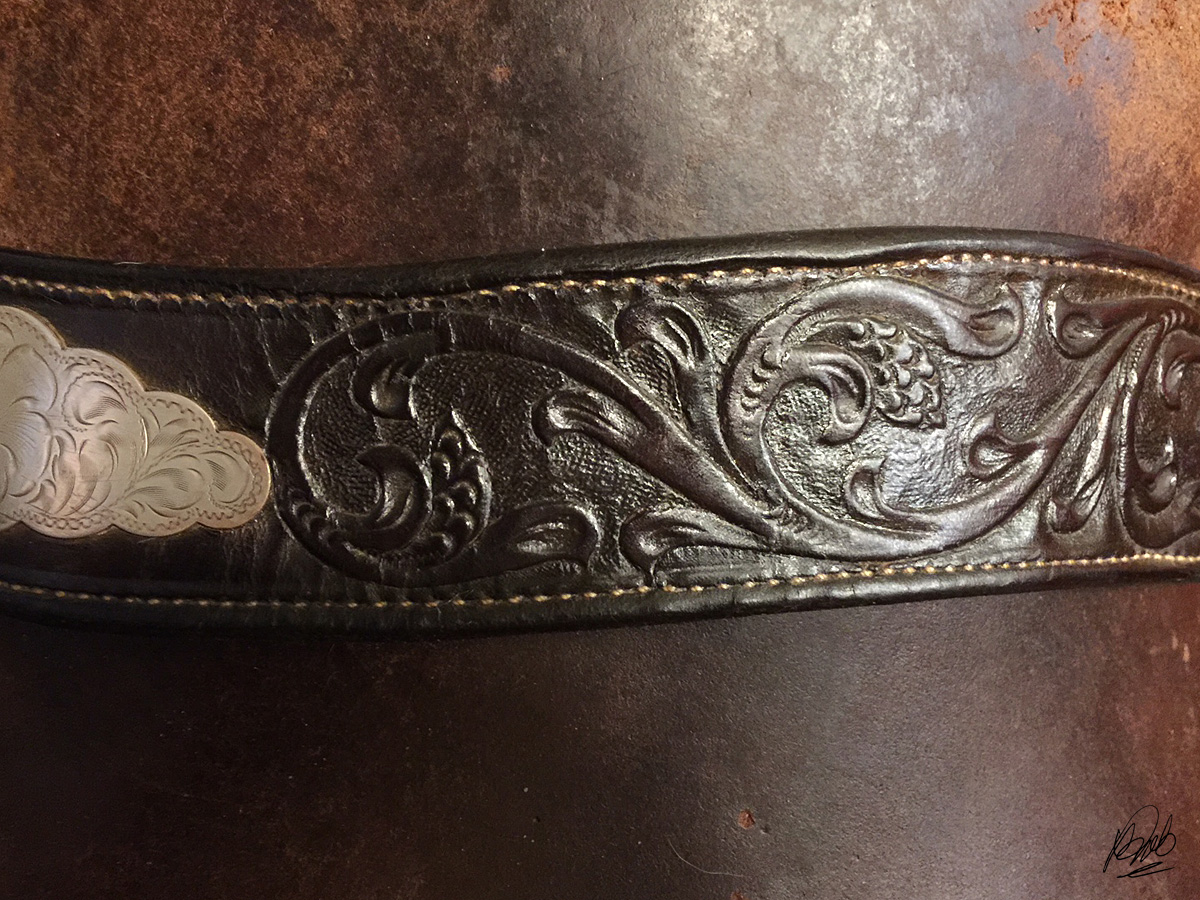
On its best day, a new Saddlesmith Bob Loomis Reiner would look similar to this. Though I never cared for the model, it was quite popular with a lot of ladies, my mom being one of them. Then again, I like how my Billy Cook Classic Pro Reiner looks and rides, and my mom detests nearly everything about it. To each their own... Photo: Google Image Search
I breezed over the scary bridge, hooked a left at Bremerton, and proceeded to Belfair to the second hand store that listed the saddle on Facebook Marketplace. I spied my mom's dream saddle unceremoniously plopped flat on a table between shelves of used cookware and old books.

Probably, for the first time I could recall, the saddle was even worse in person than its blurry listing photo.

I cruised into Belfair expecting another diamond in the rough. Little did I know, how rough.
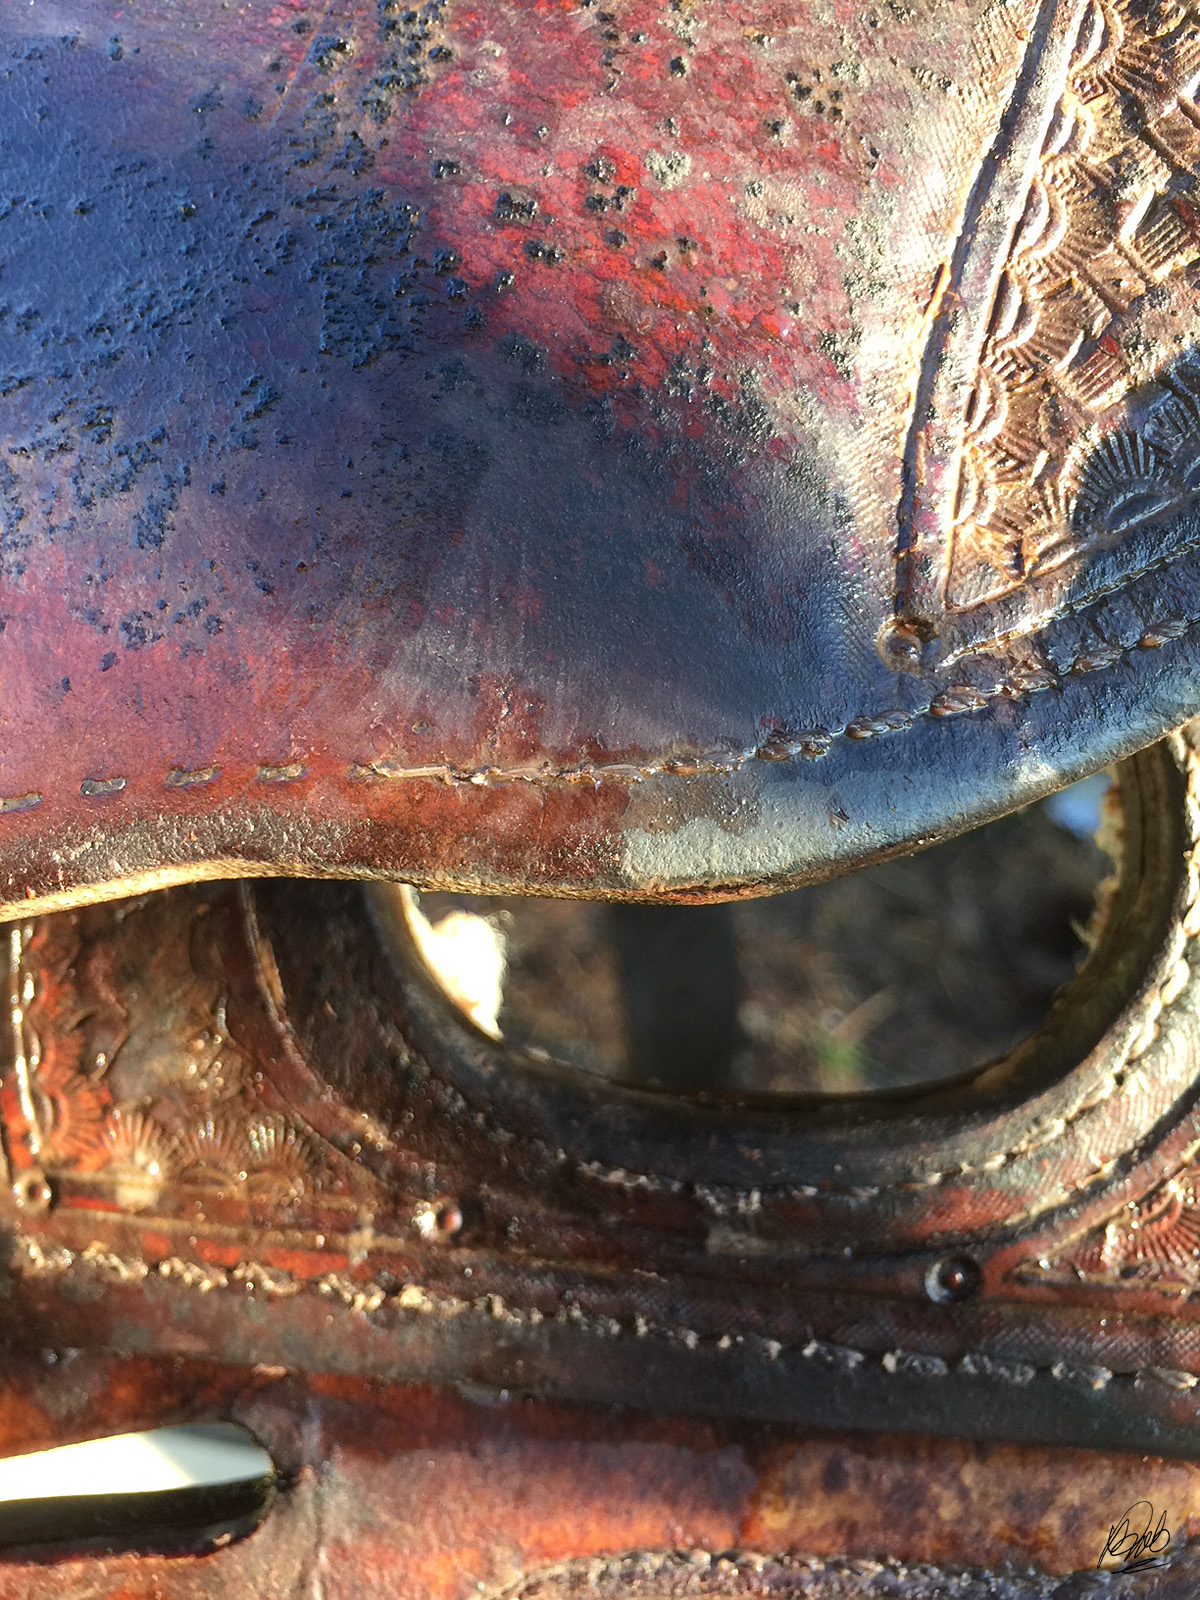
The saddle was ugly. As in, I never liked that model's looks to begin with, but this saddle was downright scary.

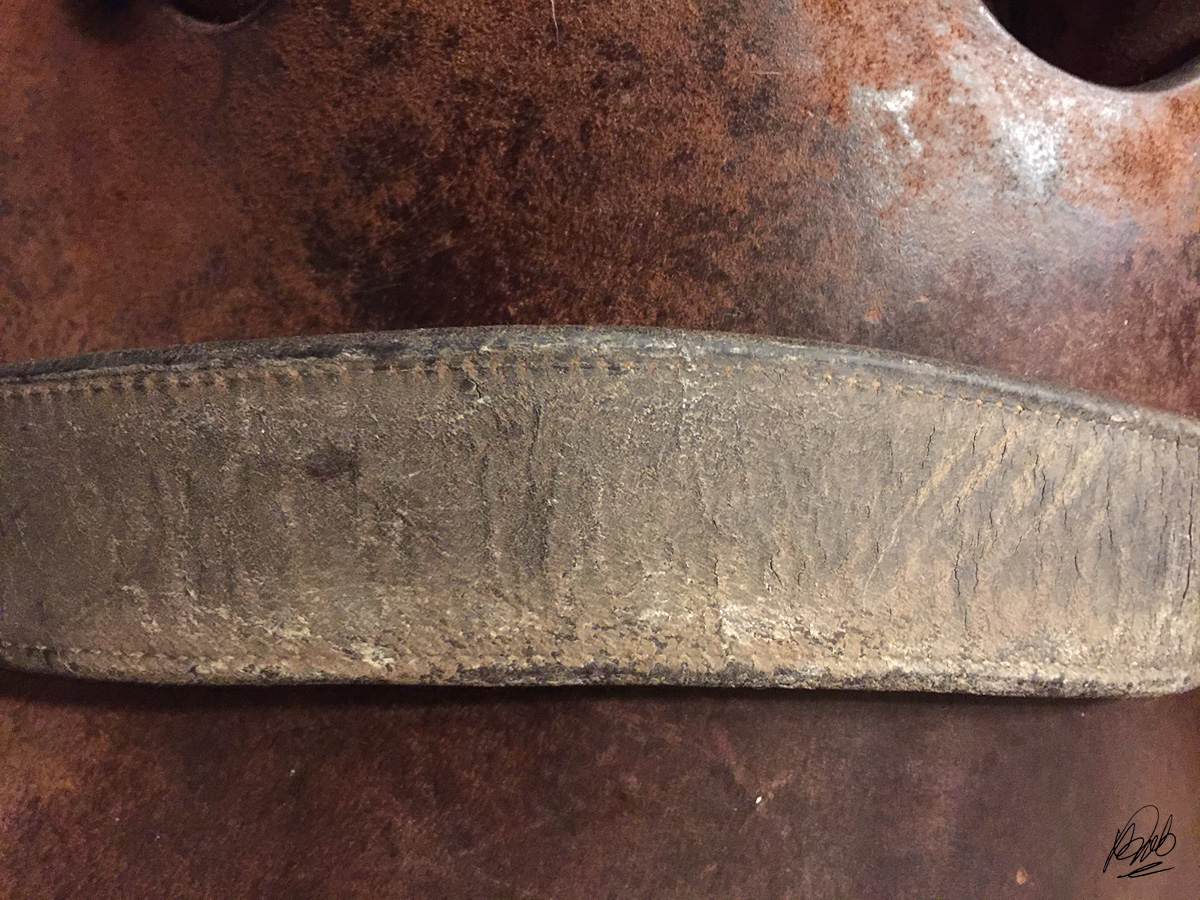
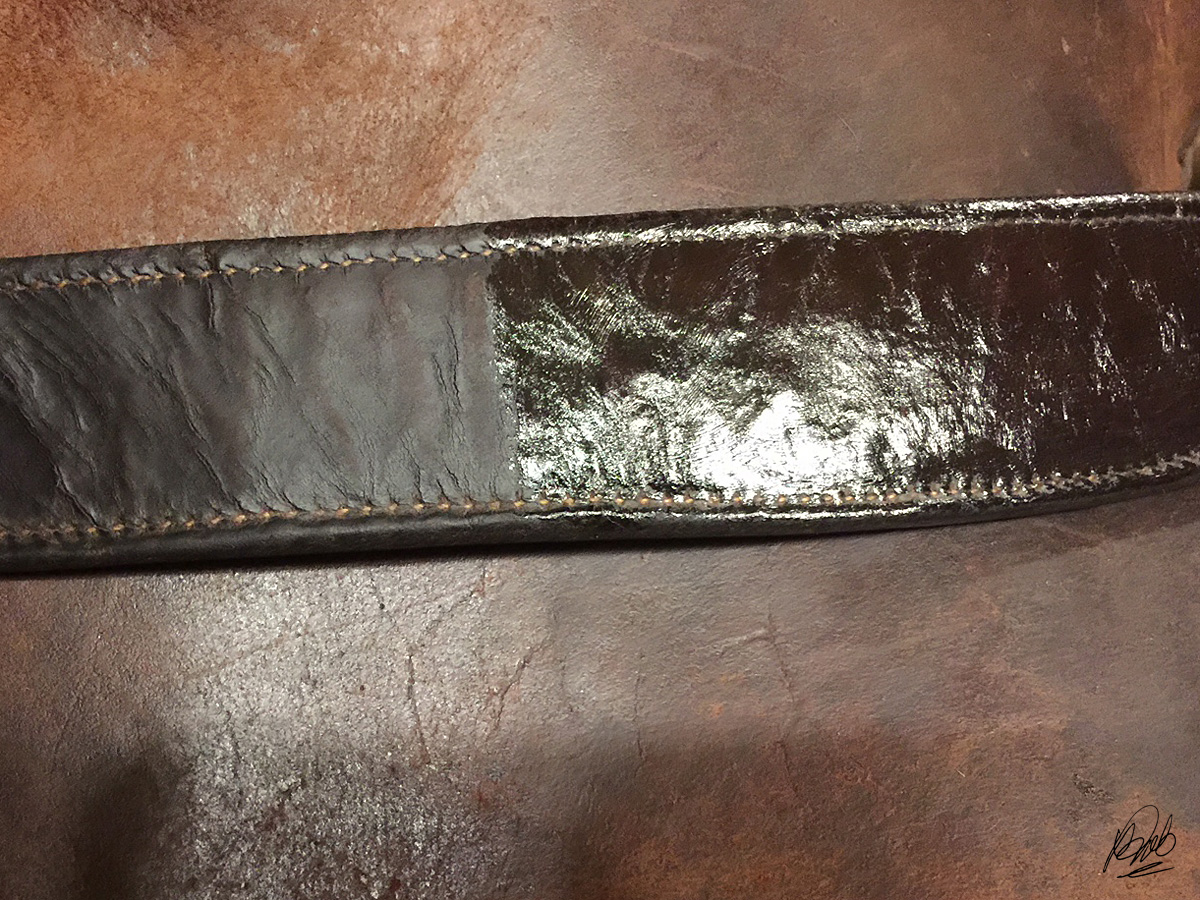
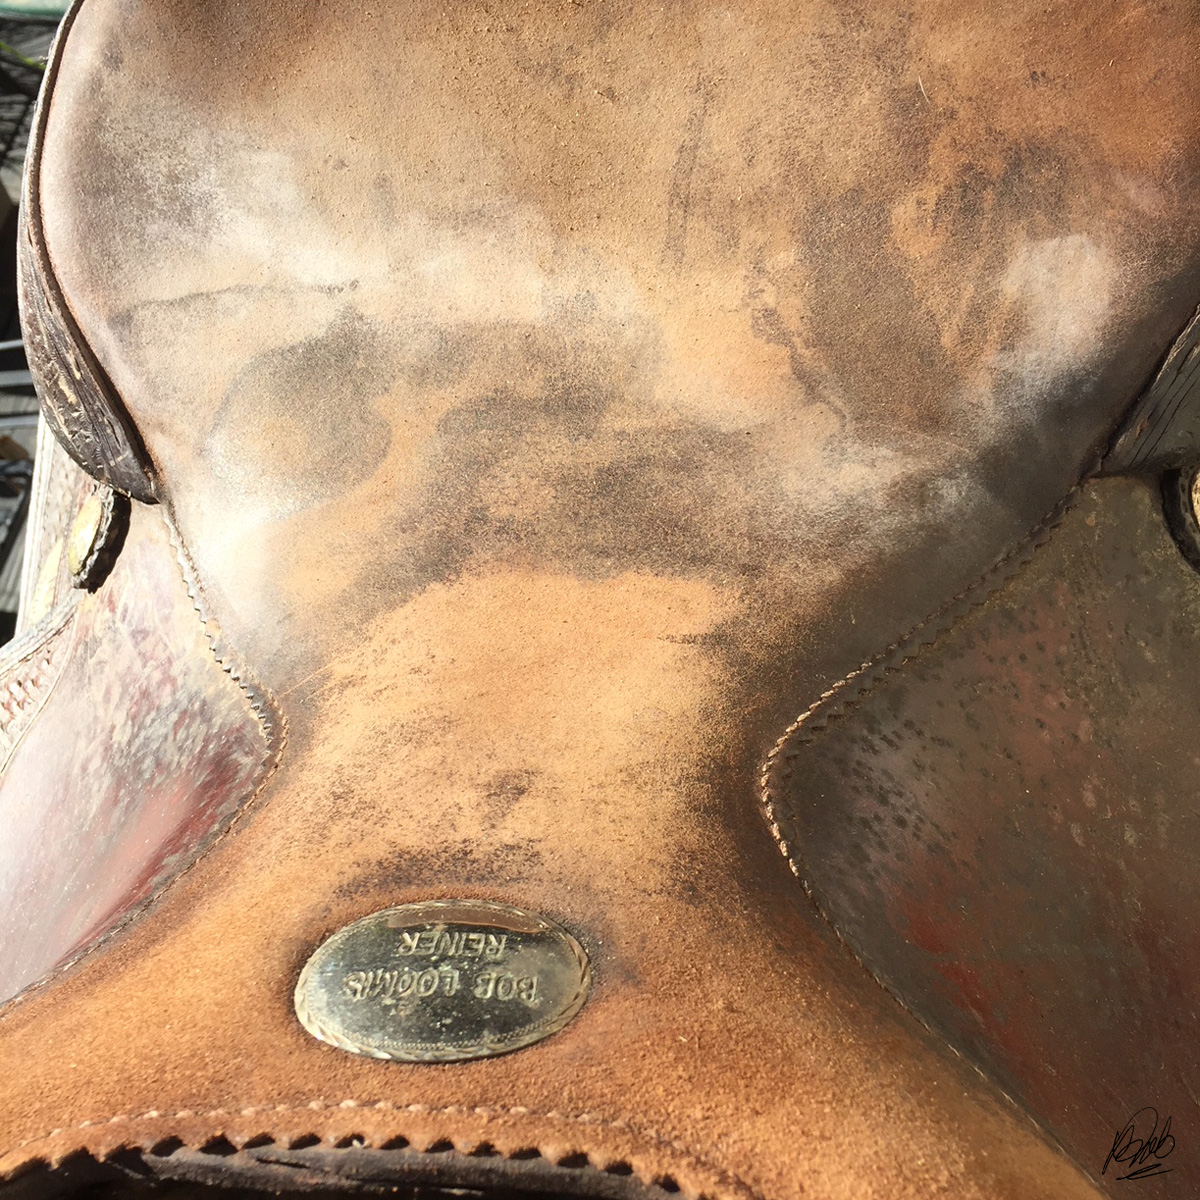
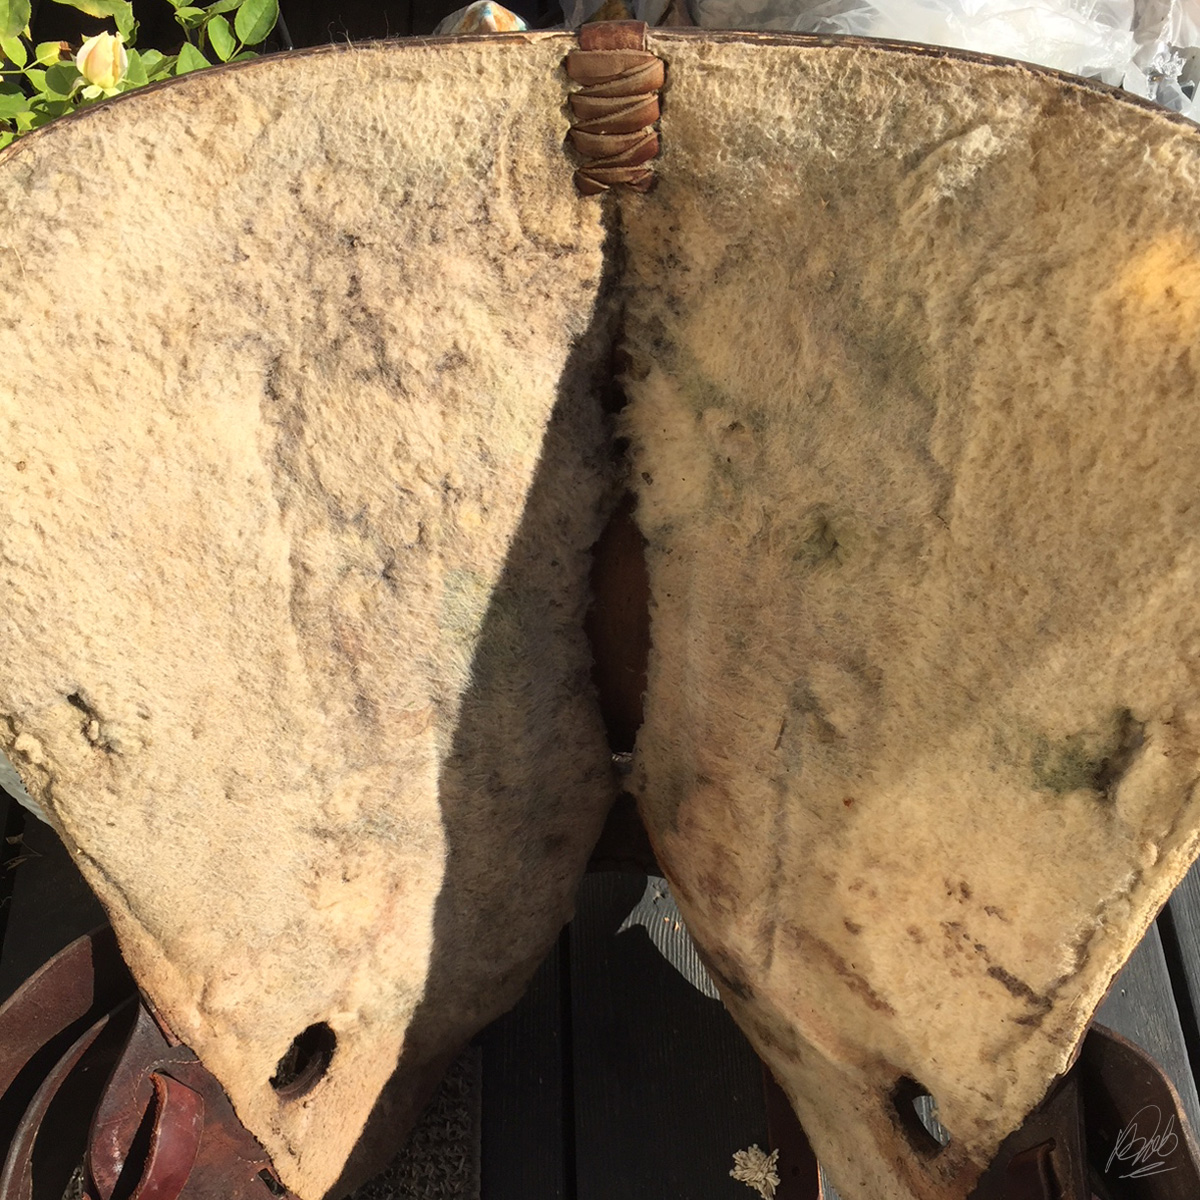
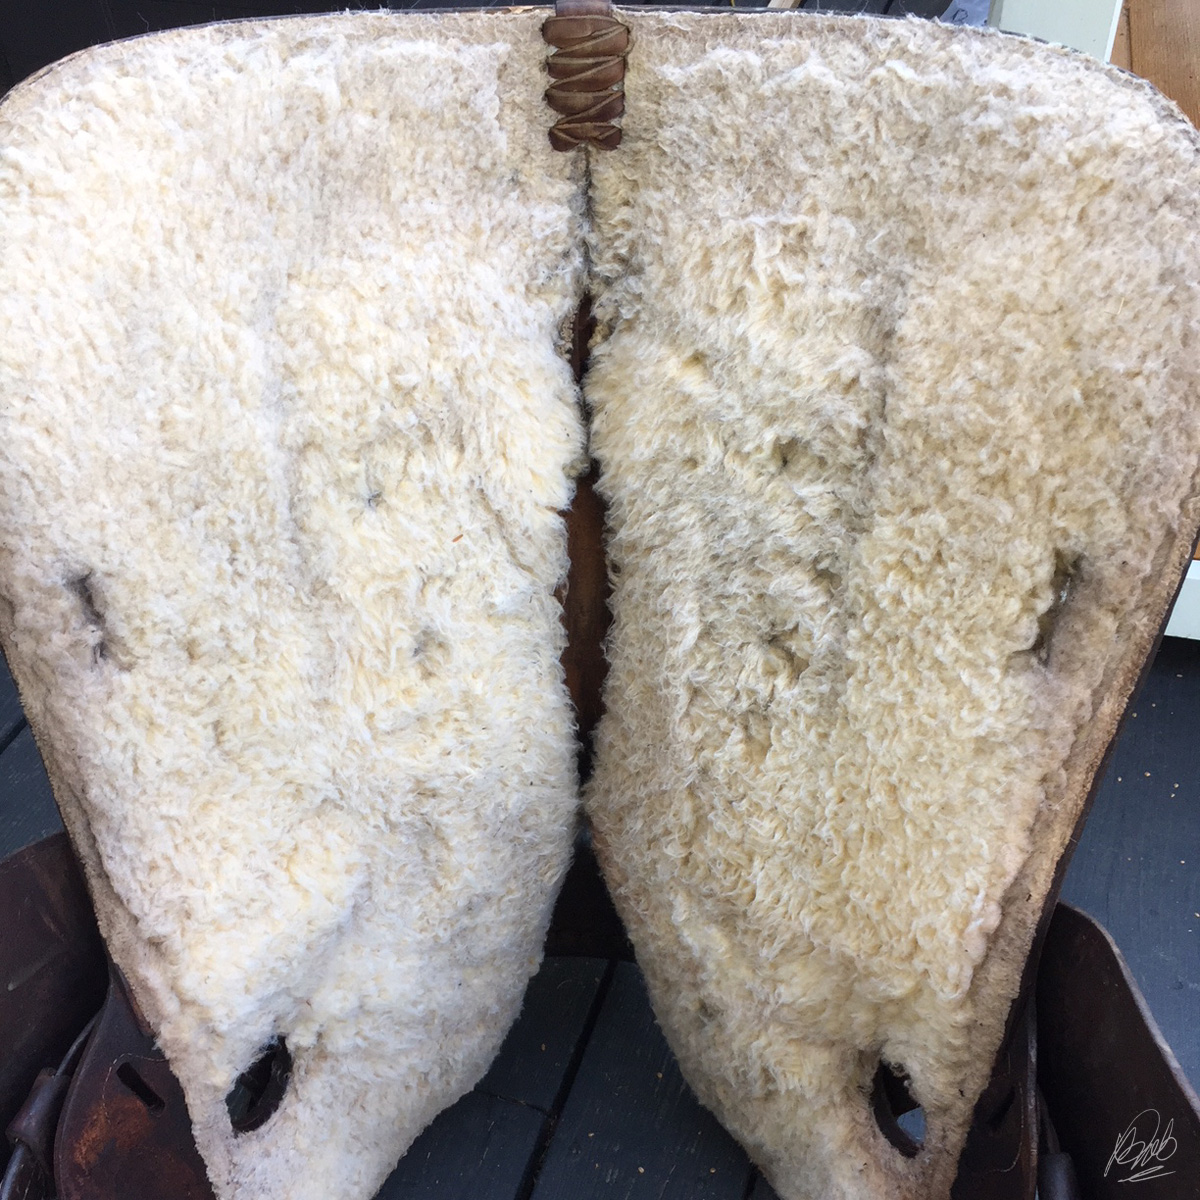
The leather on the second hand Loomis Reiner worse than neglected, dried so hard it would cut glass, so hard it sounded like knocking on a wooden door. It was covered with peculiar coatings and substances, and bore the efforts of a bad dye job. It appeared, sometime long ago, a chocolate shake had spilled and become part of the leather. The braided rawhide horn had been painted black, and poorly. Worst of all, there was a clear mystery coating over the entire saddle, basically like sealing the whole shittin' horror story in Jurassic amber. Underneath, the fleece was matted hard and caked with other substances, likely including soda pop, horse sweat, and various dirts from unknown locations.

It was putrid.

I made an offer.

They accepted.

I immediately had buyer's remorse.

Resigned to my purchase, I christened the saddle Ugly Betty, and in the van she went, next to Punchy. Suddenly, Punchy looked pretty outstanding by comparison. While Ugly Betty The Loomis Reiner was supposedly "vintage" per the seller, Punchy The Roughout Roper actually was vintage, and easily twice the saddle.

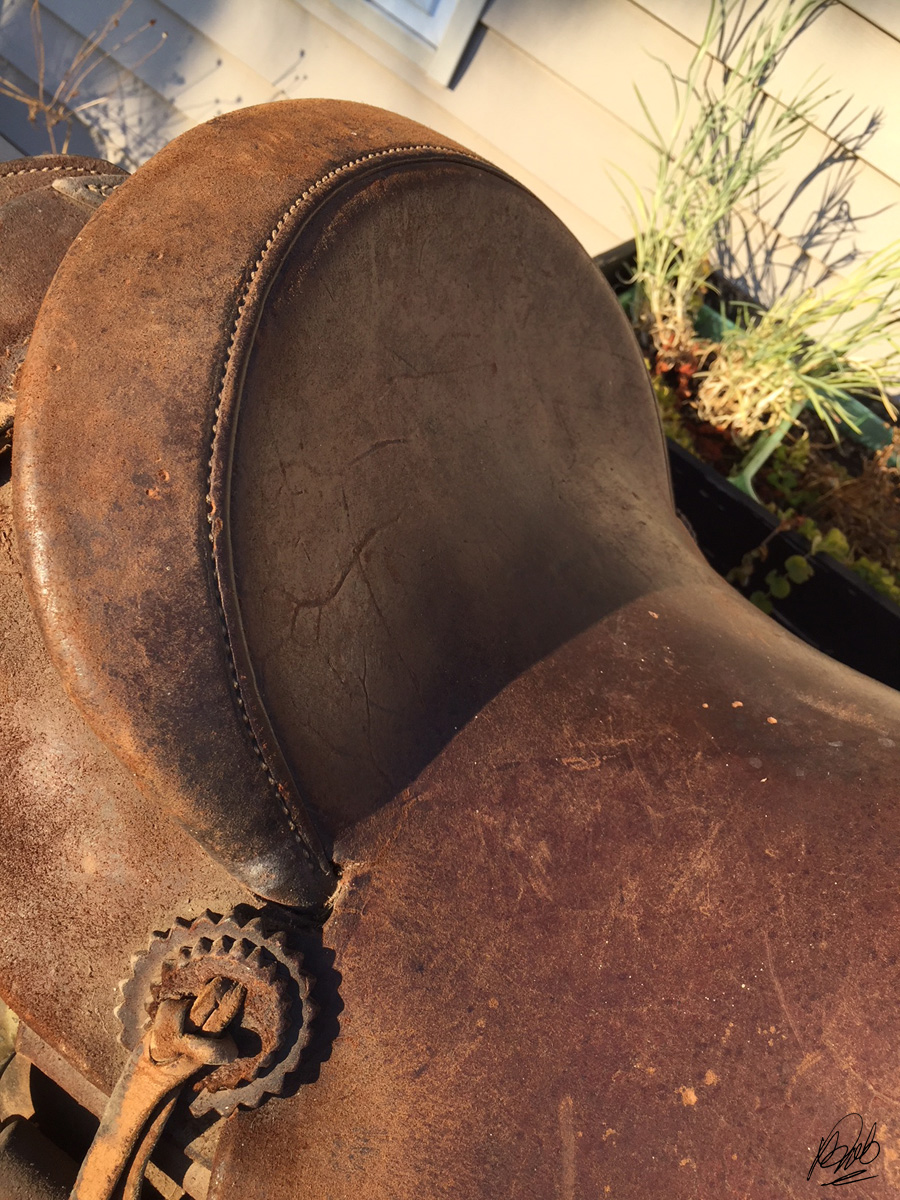
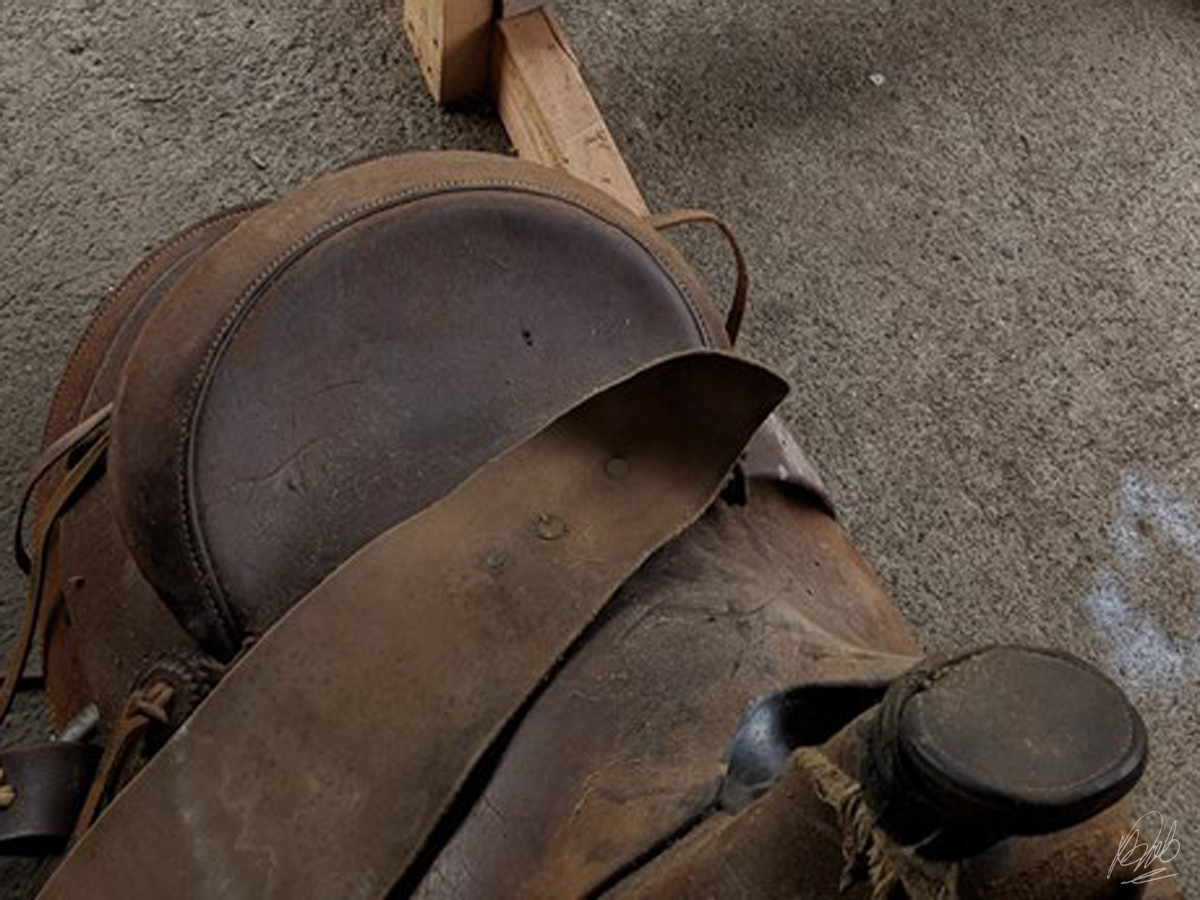
Is this not the cutest cantle you've ever seen? It may not be Vancore style shapey, but it's doggone shapey for its era. Punchy promises to be a gem after a little TLC.
Punchy would take a little cash and TLC to rehab. Ugly Betty would take a miracle and her own prayer circle. Ugly Betty might very well prove to be the saddle I lived to regret.

(If my mom is reading this, pretend you didn't see anything about Ugly Betty. I got you your dream saddle. It just needs a little... ummmm... "this-and-that" before you can see it.)

With my van full of the day's catch, I dashed homeward back across the bridge. My outing resulted in another 225-plus miles on the odometer, newly discovered places in mind to revisit, and two filthy saddles to refab. Chalk up another great adventure under my belt.

Life is good.

Crosby Equilibrium Refab, Part 3

June 13, 2018
Crosby Equilibrium saddle dyed black
With the Crosby Equilibrium deglazed and prepped for dye, I tarped everything in the proximity of my little project with plastic drop cloths from Dollar Tree. No matter how careful you may be, black dye goes everywhere. I repeat, BLACK DYE GOES EVERYWHERE. If you so much as sneeze tiny black droplets of dye will migrate places black dye should not be: the dog, the dishwasher, your favorite Oriental rug in the next room... Better to tarp now than cry later.

Tarp it like a potential crime scene. Pretend you're going to thwart CSI. Just do it.

I advocate using painter's tape to protect hardware from permanent dye stains. You can touch up errant dye later with rubbing alcohol or deglazer and a Q-tip.

use painter's tape to protect hardware from dye
I taped off the D rings, nailheads and stirrup bars with painter's tape to avoid permanent stains. I trimmed around the tape on the nailheads with a razor blade, close as possible.

Dyeing the Saddle Black with Oil-Based Dye

I've learned I get better results with basic colors using oil-based dye. With alcohol-based dyes, you often get a green or purple tint, particularly in areas with the heaviest application. With oil based dyes that normally doesn't happen. While oil based dyes are slightly more expensive they're also more economical, since they offer better coverage and superior color to less expensive alcohol-based dyes.

I used tried-and-true Fiebing's Professional Oil Dye in Black. Simple as it gets.

Wearing long latex gloves, I applied the dye with very small rags made from an old polar fleece hoodie. I covered one area at a time with small, circular motions, making sure to rub the dye in thoroughly as I went. The dye penetrates very quickly, so with anything small and simple as most English saddles it isn't a particularly long process.

Fiebing's Pro Dye (oil-based)
Fiebing's Pro Oil-Based Dye and the synthetic artist's brush I use to dye hard-to-reach areas.
In tight areas, like around the stirrup bars and the raised binding, I used a synthetic artist's brush to get in the little crevices. The dye is thin and runny, so coverage in tight spaces is relatively easy - control is the hard part.

I lined a cardboard box with plastic to contain drips while holding the saddle in an inverted position for easier access to the panels. Even so, quite messy. Plastic dropcloths are your friend.

3 coats of black leather dye
Already darkened using vinegaroon, the Crosby Equilibrium flaps and panels still took 3 coats of Fiebing's Professional Oil Dye to achieve a consistent true black color.
I used almost a full 4 ounce bottle of black oil dye to apply 3 coats. Had the saddle not been pre-stained to a dark color, the amount of dye required on its splotchy-colored aged leather would likely been considerably more.

Remove Excess Dye

Next, I had to remove the excess dye from the every surface. This required sacrificing multiple white T-shirt rags from my stash, since the black dye ruboff was horrendous. I got each rag just barely damp, rubbed and rubbed, changed rags, rubbed some more, for what seemed like infinity. Actually, I left the saddle on a chair in the kitchen for a day, and every time I walked by I'd grab a rag and start rubbing. This was by no means a single session venture.

rub off excess leather dye
If you're committed to the idea of dyeing old, non-black leather black, expect to invest some time rubbing off excess dye. It will seem endless.
The seat area proved problematic because the black dye had not penetrated the coated leather very well. No matter how much I rubbed, black dye continued to shed in a way that indicated it would be a permanent problem.

Dyeing the Seat

My solution came in the form of  several posts on designer (read: expensive) handbag forums, of all places, about a product called Tarrago Self Shine Color Dye. Supposedly, Tarrago Self Shine Color Dye dye permanently changes any color smooth leather - even black to white. Well, permanent sounded good, and the numerous before and after photos on the handbag forums looked encouraging. With nothing to lose, I ordered a Tarrago Self Shine Color Dye kit in #18 Black. For under $10 you get a boxed kit of dye preparer, a brush, a sponge, and a small bottle of dye.

Tarrago dye kit in black
Tarrago Self Shine Color Dye kit in #18 Black
I wiped the already-dyed seat thoroughly with the kit's dye preparer, let dry, then applied the Tarrago Color Dye in circular motions with the tiny sponge applicator. It could not have been easier, seriously. Though the bottle of dye is very small, it takes very little. I probably only used a total of a couple eye dropper-fulls to cover the seat completely.

Two coats of Tarrago Self Shine Color Dye later, the seat was a glossy, true black. After allowing 24 hours to dry, the finish felt somewhat plasticy, but would not rub off despite attacking it vigorously with a rag. For that matter, the old seat had felt plasticy, and it had lasted more than 30 years. Regardless, it was a marked improvement over the oil dye finish that had not penetrated the seat leather very well and promised a lifetime of ruboff. Maybe those folks on the handbag forums were on to something!

Tarrago Self Shine Color Dye in Black on saddle seat
Tarrago Self Shine Color Dye (left) and original seat finish (right)
Before sealing the dye job with Resolene clear finish, the saddle needed a deep conditioning. I busted out some heavy duty stuff: Effax Lederbalsam.

Condition Before Resolene

I went at it with Effax, a couple coats rubbed in by hand, and the saddle began to glow with happiness. After 3 coats of oil-based dye plus Effax Lederbalsam, the leather from stem to stern was soft as butter, probably for the first time in years.

treating with Effax Lederbalsam
After rubbing in Effax Lederbalsam, I left the saddle outside in the warm sun to soak it up.
I spent a fair amount of time rubbing the saddle surface clean of excess Effax, as it tends to leave a protective coating that would inhibit the Resolene sealer from bonding. Once the surface felt "clean" to the touch, it was time to apply Resolene.

Seal It With Resolene

Resolene can be tricky to apply, since it tends to streak as it dries, and light coats will dry quickly at room temperature. I've found using a very soft 1" flat synthetic art brush on saddles works well and makes blending areas easier than a dauber or rag.

Fiebing's Resolene
I apply Resolene to most tack and saddle leather using a very soft 1" acrylic paint brush.
I let the first coat of Resolene dry overnight, then evaluated trouble spots the next day in better lighting. The second coat of Resolene was much more uniform. When the Resolene was completely dry, I was delighted any hint of ruboff was over. Problem solved!


before and after applying Resolene to dyed leather
Compare area without Resolene, dull and gray looking (left), and after (right) Resolene makes the dye color deep, rich and shiny.

Happily Ever After

If I had any reservations about dyeing the Crosby Equilibrium black before, I was more than happy with the result. What began as an iconic saddle whose best days appeared to be behind it, ended with a stunning piece of saddlery that glows with new life.

After dyeing the saddle black
After dyeing and applying Resolene the old Crosby is fit and foxy again. Another successful refab!

Crosby Equilibrium saddle dyed black
Pure, true black, and best of all: No ruboff! Even the seat leather dye was stabilized.

overhead view of seat dyed with Tarrago Self Shine Color Dye
The problem seat leather was dyed with Tarrago Self Shine Color Dye in #18 Black. Time will tell, but the dye appears to have excellent cover and adhesion.
Crosby Equilibrium dyed black
The end result was beautiful, buttery soft, conditioned leather. A little TLC (and assistance from reliable products!) goes a long way.


Free Western Show Vest Pattern Download

June 12, 2018
free western show vest printable pattern
Oh my gosh! On a casual drive-by at Pinterest, I happened upon a free lined western show vest sewing pattern at Modern Sewing Patterns too good not to share. Choose your size at the bottom of the page and download the PDF pattern for printing. (You'll also need to print the page of pattern instructions.)

The most awesome thing about this is it's a very contemporary pattern - the same basic pattern you've seen worn a thousand different ways in the show pen. Choose a luxury fabric, keep it classic or pile on the bling - it's all up to you. What this pattern offers is a great starting point for your own designs.

Sizes listed are Small through Extra Large, with a sizing chart. Modern Sewing offers instructions how to print their downloadable sewing patterns here.

So, fire up the printer, put a new needle in your machine and bust open your fabric stash. Sew moms and dads and all you show pen fashionistas, you have some sewing to do!

Vintage Equestrian Sewing Patterns

June 06, 2018
I have quite an odd vintage sewing pattern collection of old buckaroo shirts, flared breeches, and - my favorite - western equitation suits. I get emails all the time asking where people can find similar patterns, or what pattern companies they should be looking for.

I find patterns on eBay and Etsy, primarily, though some of the newer pattern reproduction companies have plenty of interesting offerings, often with much better sizing and instructions than the originals.

Lola Gentry Originals

When I was a kid, Lola Gentry Originals were the be all end all of sewing patterns for show moms. Imagine, you could walk in a western wear or tack store, and they stocked Lola Gentry patterns just as casually as JoAnn's carries Butterick and McCall's. For years, Western Horsemen carried Lola Gentry Originals ads in the back of their magazine, where you could physically mail green money to an address and wait for your pattern to come in the mail. Crazy, right?

Lola Gentry Originals pattern catalog
Lola Gentry Originals Pattern Catalog. Photo: Pinterest

I don't know how many patterns Lola must have sold back in the 60s and 70s, but everyone I knew that sewed had at least one. The one-piece double knit polyester equitation suit was the A#1 hot shit back in the day, and that pattern came from none other than Lola Gentry. It was the holy grail of patterns, right down to the authentic keystone belt loops and a big ole pointy collar.

I'm getting misty.

Anyway, I spoke to Lola herself several years ago - just the sweetest lady - and she was kind enough to print me off one of the original one piece equitation suit patterns. I have yet to find a double knit polyester worthy of the pattern, but it's on my bucket list.

Lola Gentry passed away in 2016, but Walker's Western Wear of Arizona still offers the majority of her western wear pattern lineup, plus her English shirts, breeches, jods and jackets. I'm joyful Lola's patterns are still available to the next generation, even if double knit polyester isn't the fabric of choice.

Jean Hardy Patterns

If Lola Gentry Originals was Coca-Cola, then Jean Hardy was Pepsi. I don't know much of the backstory on Jean Hardy, but the company had an extensive catalog of western wear, jackets, blouses, vests, chaps, English attire, and even sportswear. Jean Hardy patterns were printed on heavy paper and packaged in oversize envelopes in their trademark orange, white and blue - you couldn't miss them.

Like Lola Gentry, Jean Hardy offered both a one-piece and two-piece equitation suit that was made and remade for years by all those talented sewmoms; big collars, long zippers and keystone belt loops in every conceivable color and pattern. Add a bright felt taco hat and some pointy-toed Tony Llamas and you were the belle of the ball.

Jean Hardy equitation suit patterns
Vintage Jean Hardy #190 and #200 equitation suit patterns.
Jean Hardy, a California company founded in 1971, disappeared off the radar in the past few years. Patterns can still be found online through avenues like eBay, Etsy, and vintage OOP (out of print) pattern resellers. Expect to pay upwards of $30 or more for an uncut pattern, so grab any bargains you find before they become rare as hen's teeth.

Authentic Patterns

Along with a staggering lineup of square dancing patterns, Authentic Patterns, Inc. of Forth Worth, Texas was another popular source for western jackets, pants, tops and even chaps. Like Jean Hardy, Authentic Patterns was fond of oversize envelopes, as their patterns were printed on heavy paper to be traced and re-used.

One of my favorite things about Authentic Patterns is they sometimes featured large photographs on their pattern covers at the zenith of cheesy western fashion. Gals with big hair, big fannies and big thighs, with occasional bulges and pantylines. Long before the days of Spanx, they were using real size models real size gals can identify with. A stroke of marketing genius, it was.

I sewed a pair of western pants a few years back using Authentic Patterns #230. Imagine my surprise when the unaltered pattern actually fit my big rear and thighs like a glove, without looking obscene. In all the years I've been sewing, that's the first and only time that's ever happened. Ever since, it's my go-to show pants pattern, and possibly my favorite pattern of all time. The keystone belt loops only make it that much better.

Authentic Patterns, Inc. Western Patterns
Authentic Patterns, Inc. #209 and #259
In my experience, there's little room for error on measurements with Authentic Patterns. They are not sized generously, so make allowances when shopping your size. If in doubt, consider sizing up.

Authentic Patterns is another gem that went the way of the dinosaur. I've found several on eBay and Etsy, but every year the pool of remaining uncut patterns gets smaller.

Vintage Reproductions

Several pattern companies have carved their own niche offering vintage reproductions, complete with improved and expanded pattern instructions, fabric recommendations, and handy hints regarding historical construction techniques and whatever oddball notions you may need.

Mrs. Depew has a stunning vintage riding coat pattern and a vintage flared breech pattern that I love, love, love! for less than $10 each. Patterns are offered as downloadable PDF files for printing. Mrs. Depew patterns are also available through their Etsy store.

Mrs. Depew vintage style sewing patterns


Reconstructing History
is so doggone awesome they have an entire category dedicated to equestrian patterns. Vests, jackets, breeches, riding skirts - they have it all. You can order printed paper patterns or downloadable PDF files. Prices vary, but most patterns run $15-16 and under.

Reconstructing History patter
A terrific breeches and jods pattern, and one of many fashionable riding jackets from Reconstructing History.


If you're going to strum your geetar on the lone prairie, you can outfit yourself in style with patterns from Folkwear. They carry patterns for western shirts, riding skirts and several jacket styles for $20 and under. Their pattern illustrations on the website are beautiful, so expect to spend some time browsing through their other styles.

Folkwear patterns
A versatile western shirt pattern and frock riding coat for men and ladies from Folkwear patterns.

Buckaroo Bobbins offers a Saturday Matinee pattern for guys and gals with all the important details of  retro western wear, including smiley pockets, extended cuffs and even embroidery instructions. This is a shirt that could easily be dressed up or down, and could make a phenomenal custom ranch riding blouse with mix 'n' match custom fabrics, piping or embroidery. Priced around $15, there's even more prairie goodness to be found at the website.

Saturday Matinee shirts by Buckaroo Bobbins
Retro as it gets, the Saturday Matinee shirt from Buckaroo Bobbins.


Saundra Ros Altman's Past Patterns is a treasure trove of historical designs from the 1800s through the past century. For re-enactment or costumes, this site offers something for everyone.

For Sale: 17" Courbette Stylist

June 04, 2018
17" Courbette Stylist Close Contact Saddle
Beautiful vintage Courbette Stylist, made in Germany (Kloster Schönthal). Minimalist close contact style with the sought-after square cantle styling. A prestigious hunter/jumper saddle in its day, it remains popular in the Arabian and Morgan show circuits. Everything about this is saddle is extremely well maintained with very little wear; billets, panels, flaps, seat - all great. It's show ring ready.

17" Courbette Stylist Close Contact Saddle
Tree is marked 31, 17" seat. Plain flaps, no knee roll.

seat size 17, tree size 31
Comes with red Courbette saddle cover.

Courbette saddle cover, new stirrup irons and leathers
Brand new 54" adult stirrup leathers and brand new black 4.75" rhinestone-accented stirrups included.

black stirrup irons with rhinestones
All leather is soft, supple and high quality. Really a showpiece and built to last a lifetime.

Brand: Courbette
Model: Stylist
Tree: 31cm (fits like a generous medium)
Seat: 17"
Color: Black
Condition: Excellent
Extras: Red Courbette saddle cover, brand new red all purpose pad w/red, gold and black trim, new 54" adult stirrup leathers, new black 4.75" rhinestone stirrups
Price: $335 USD
Shipping: $60 in continental US
*Sold used, as is. No returns*


My Instagram

Copyright © The Brown Rider. Custom template by OddThemes