>
Showing posts with label DIY. Show all posts

Punchy the Saddle's Second Career

September 16, 2018
•
Punchy was a gem found on my Labor Day weekend saddle tour, and I have to admit it was love at first sight. Not impressive in any way upon discovery, Punchy was precisely what I'd been looking for.

Dusty and crusty, Punchy sat on a rack under carport wearing the marks of an interesting previous life.

Punchy had been a roping saddle, back in the day before all the pro cowboys wore sponsor logos. Purely utilitarian, Punchy was not even a high end saddle. No tooling, no conchos; a bare bones base model with six strings, a stout neck and a pelican horn. The only possible upgrade may have been brass rigging, but in its day that was not at all unusual. Remnants of a real sheepskin lining clung to the skirts, worn away with a lifetime of use and whatever the mice made off with.

The likely future for saddle of Punchy's age could have been as a decorative bar stool, or maybe some unsuspecting parent's gift to their child as an affordable first saddle, though in no condition to fulfill its purpose.

Western saddle bar stools. Not in Punchy's future, if I have anything to say about it. Photo: Pinterest.
I had a plan for Punchy, and it didn't involve home furnishings or a throwaway riding rig to be cast off at a garage sale, simply sold as "vintage." I wanted to give Punchy a second career as a ranch riding class saddle; restored, appreciated, and able to shine again.


Punchy had a lot in his favor that leaned toward a second career as a using saddle. Most important, his bar spread was not the narrow style found on so many vintage saddles. Unfortunately, a lot of  vintage western saddles simply will not fit the wider conformation of today's stock horses, and spend the rest of their life as artwork, traded and sold like rare baseball cards between collectors.

This incredible 1890s slick fork Visalia (Wegner & Walker) saddle and accessories set sold for a strong 5 figures at auction in 2014. However, as a using saddle, it probably would not fit anything in my barn. Photo: iCollector
Punchy did not possess the beauty or pedigree of a collectible, but he did have a tree that would fit a garden variety stock horse, even today. Given the fact Punchy had obviously done some roping, the rawhide tree was remarkably tight and true.

The second most important plus was Punchy had a seat large enough for my modern day rear end. Not a large seat, mind you, but a strong 15" slick seat with a low cantle that beckoned "Hop in, let's go for a ride."

So many vintage saddles look like "the one," only to find out they have a live seat area of maybe 14 inches. They were made in an era when people were generally smaller and slimmer than today. If you're a gal with the behind of a Barbie doll, they may be a go. I happen to have a butt like Beyoncé and the thighs of an East German speed skater. A 14" seat for me is out of the question, and a 15" has to be set up just right or it's still way too cozy.

So many great vintage saddles have small seats and narrow trees, making them unusable for folks with wide horses and/or big bums. Photo: eBay
With the majority of vintage western saddles being too narrow for my horse, with seats too small for my fanny, Punchy was an anomaly. I felt I had something with potential as a using saddle, at any rate.

On the plus side:
  1. Punchy has what could be considered today as Quarter Horse bars, more or less
  2. The rawhide covered tree is sound
  3. The seat measures a full 15"
  4. Full double brass rigging
  5. No real leather damage, dry rot, or extreme wear
  6. Cantle is in good condition, exquisitely shaped, without any warping 
  7. Horn is tight and straight, and my preferred pelican shape
  8. Made with saddle strings through the tree
  9. Galvanized 3 1/2" bell bottom stirrups appear original 
  10. Both original flank billets in very good condition
On the minus side:
  1. No maker's mark, which affects resale value
  2. Untooled, roughout leather makes it less fancy
  3. Round skirt style is not particularly en vogue
  4. Fleece needs replacing, absolutely
  5. Old style bolt-and-pin stirrup leathers need an upgrade
  6. Saddle strings need replacing
  7. Missing one of the original sawtooth edge leather rosettes under the saddle strings, which are hard to match
  8. One leather stirrup tread is missing, they should both be replaced 
  9. Needs stirrup hobbles
  10. Rope strap on fork needs replacing
Really, except for the fleece and strings being replaced, which requires some time and cash invested at a good saddle shop, Punchy's fixes aren't terribly exotic or expensive.

Smaller, rounded skirts are certainly not the height of show ring fashion, but no one can say they aren't "authentic" or "traditional."
I don't mind the round skirts, the roughout leather, or the fact Punchy isn't fancy in any sense of the word. This is a blue collar saddle with a solid resume. It isn't pretending to be something it's not, and it's still game for action.

Ranch riding saddles don't need to be fancy, they need to be believable as serviceable work saddles one might use every day in a ranch environment. This means without the typical heavy silver adornment of western show saddles, rigged and ready for hard riding. In this case, authenticity trumps beauty, brand label, or even newness.

For ranch riding classes, plain is actually a virtue.

This ranch class winner rides a plain, workmanlike, reiner-style saddle with simple silver conchos. A breast collar and flank cinch shows they're rigged and ready for anything that may come their way. Photo: Journal, by way of Pinterest.
Dozens of makers' reiners, ropers, cutters and cowhorse saddles were born ready for such events. Because of the growing popularity of ranch horse classes, even makers like Harris, known for their over-the-top custom silver show saddles, has introduced models for ranch competition.

Simple, workmanlike Billy Cook reiner (left) or a pared-down showstopper like Harris's ranch riding saddle (right) - either will fly in today's ranch riding classes.

Square skirt custom Teskey's ranch saddle (left) and base model Wade from Burns Saddlery (right) represent consistently popular styles in ranch riding competition.
Luckily, Punchy more than qualifies as authentic. Beyond that, what anyone chooses to ride is personal preference.

Punchy's in the cleaning and assessment stage now. After a good scrubdown with soap and water, the next step has been some overdue conditioning to strengthen and preserve the aged leather.

Roughout saddle leather can be a little tricky to condition, but so far Punchy is responding well to being misted with Lexol, with brushouts between sessions to retain the nap. The undersides of the fenders and stirrup leathers are all enjoying some Oakwood Leather Conditioner and Passier Lederbalsam.

After a thorough scrubdown and repeated misting with Lexol, Punchy's true colors are beginning to show. No longer dusty, dull and faded.
Once the saddle is feeling fit and foxy, it's time to think about some upgrades before it's sent to the saddle shop. For now, Punchy's enjoying all the attention. I think he's eager to join the working class again.

The Beautification of Ugly Betty, Part 1

September 06, 2018
•
If you read the previous post about my saddle day trip, you know I got a used saddle for my mom I named Ugly Betty. Why? Because Betty is straight up ugly.

Saddles can tell you a story, or a lot of stories. I think Betty's goes something like she was the victim of a vicious divorce, where the opposing spouses were instructed by a court-appointed therapist to relinquish their cutlery and firearms and take out their frustrations on an inanimate object. One spilled soda pop on the fleece, the other turned her over and doused her with a chocolate shake. They took turns dropping her and stomping her in the dirt, then one threw dye on her to up the ante. When the divorce was final and they hugged out their differences, they sprayed lacquer up one side and down the other to symbolically entomb all the bitterness they'd moved past. In the end, Betty was carelessly cast aside like a dread trigger object as each chose their path toward a new life.

Or something like that.

Betty had suffered, that was evident. No saddle, not even a model I don't like, deserves that kind of treatment. I'm pretty sure when Saddlesmith took Betty off the bench and boxed her up to meet her future, they never anticipated just how much misfortune lay ahead, or how much abuse a little ole production model like Betty could endure.

It's like the tale of Black Beauty, but with a saddle.

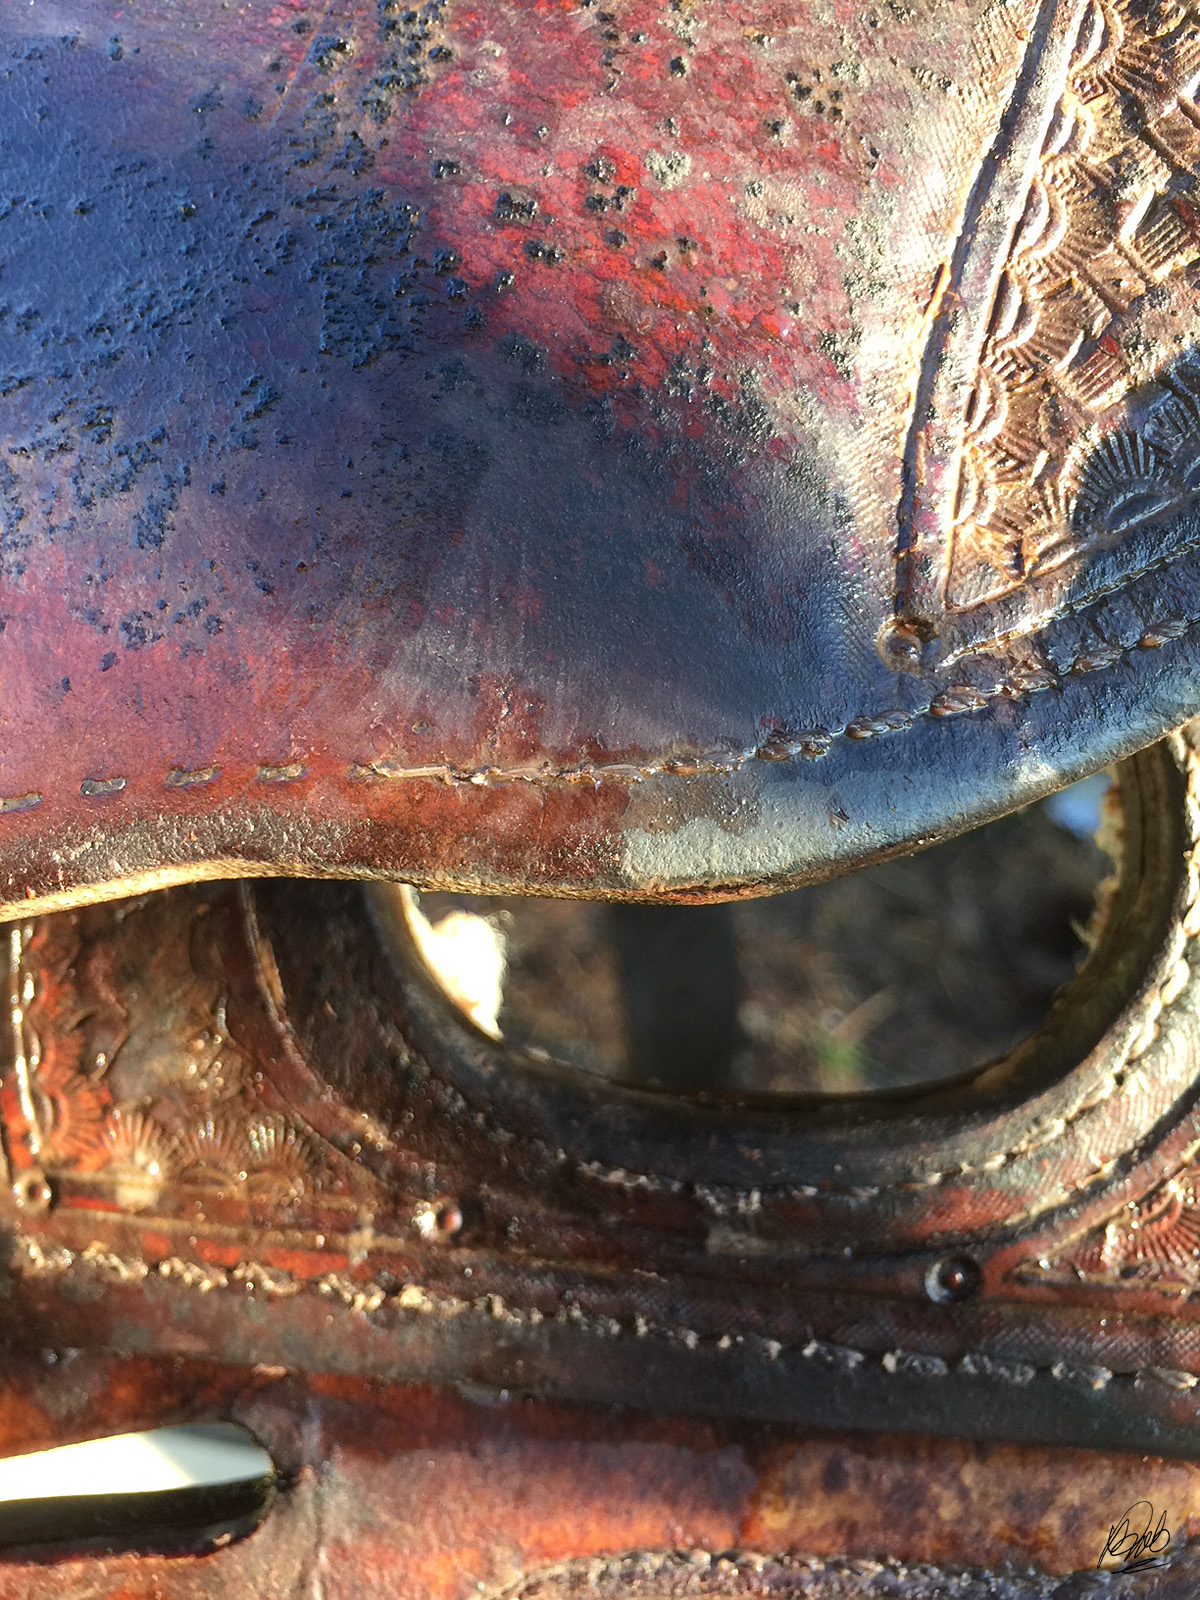
All the dirt and filth was sealed under a haphazardly applied layer of lacquer, making it nearly impenetrable. This is an area just above the rigging.
Betty's safe now, and will once again be beautiful, but it's going to be a hard-fought battle to bring her back.

On the plus side:
  1. There is very little actual damage to the leather, it's virtually all cosmetic
  2. The tree feels and sits solid
  3. Most all the stitching is intact, save for typical wear areas on any saddle
  4. It doesn't need refleecing
  5. The seat is fully intact
  6. There is plenty of adjustment in the fenders, they go quite short for smaller riders like my mom
  7. New latigos on both sides
  8. Nothing wrong with the stirrups
  9. None of the silver plated concho tips are missing

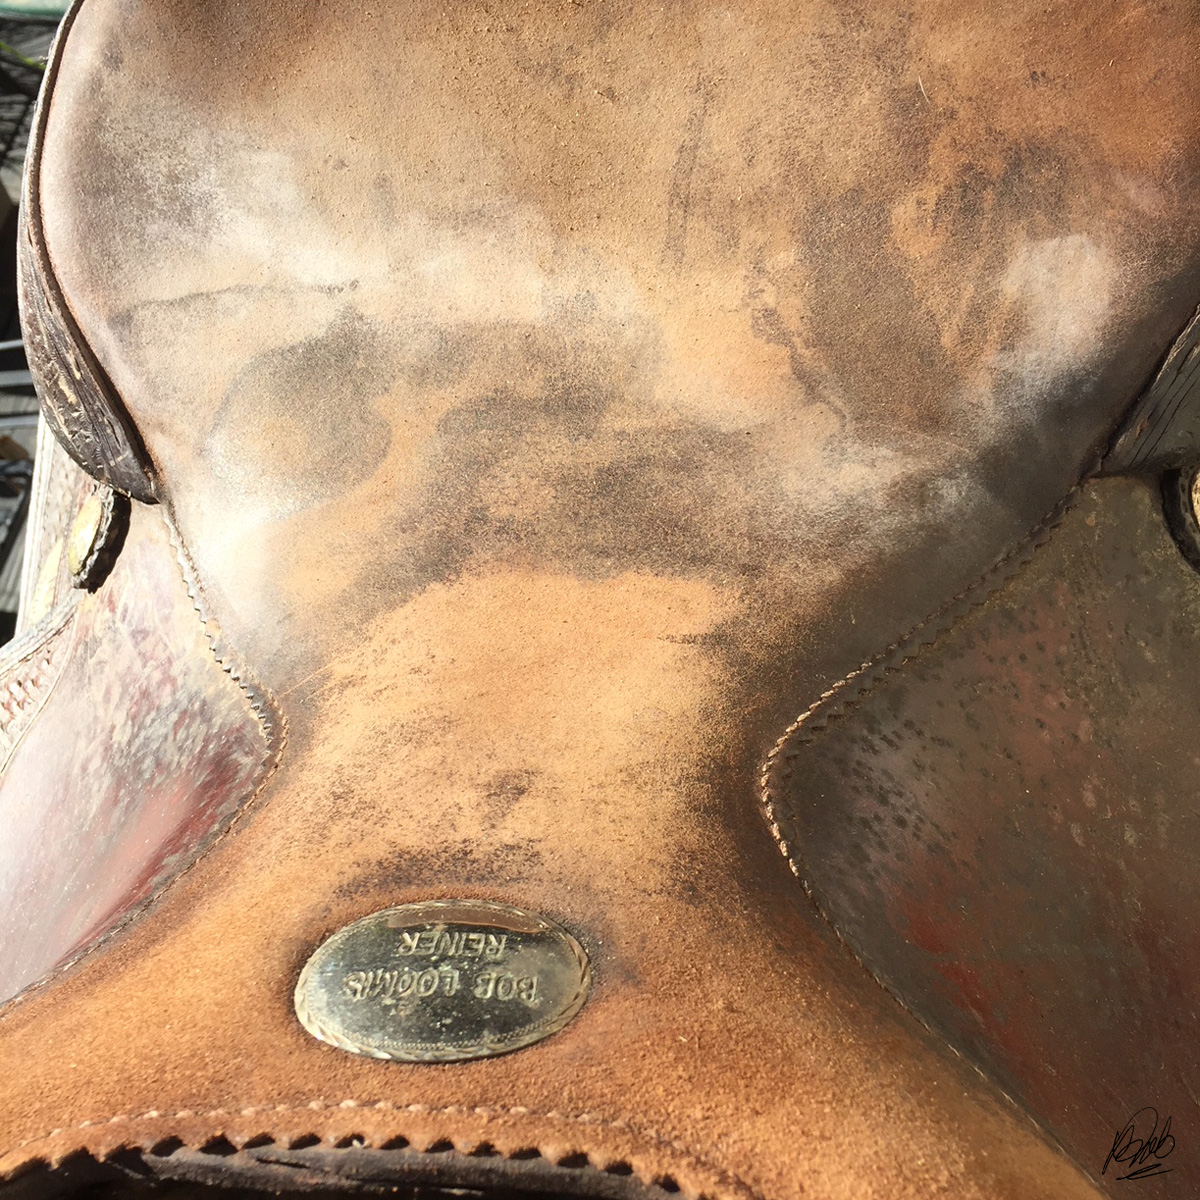
Betty's roughout seat was every bit inviting as a Honey Bucket. No thank you!
On the minus side:
  1. All the lacquer needs to be removed before the dirt will come off
  2. The dirt is substantial - more than I've ever seen on any saddle
  3. Dirt is deeply embedded in the basket stamping, which means a lot of detail work with a soft toothbrush 
  4. Bad dye job attempts are irreversible, it cannot return to its original mahogany color 
  5. The seat is stained so badly it will need to be dyed
  6. Fleece is matted hard and absolutely filthy
  7. Blevins buckles on fenders corroded so badly the prongs have broken off and need replacing
  8. Missing a concho - they all need replacing because of tarnish and flaking of silverplate
  9. Skewed skirts need to be reshaped and set
Before anything can proceed, Betty needs to be cleaned from stem to stern. This is not going to be a simple once-over with Pears Soap or generic leather cleaner; Betty requires industrial cleaning.

Sometimes, you have to be cruel to be kind. Betty was hardcore filthy - so filthy she made my skin crawl. This calls for super strength cleaning products not normally associated with cleaning leather.
My industrial cleaning kit includes a bucket, Dawn dishwashing detergent, a couple drops of chlorine bleach, a microfiber scrubbing mitt, a soft toothbrush, a spray bottle, and a super strength sprayer on the garden hose.

Yes, I said garden hose.

I have to wash Betty similar to how you'd wash a car or a filthy horse: lots of water, lots of cleaning product, and lots of scrubbing and rinsing. There's no way around it.

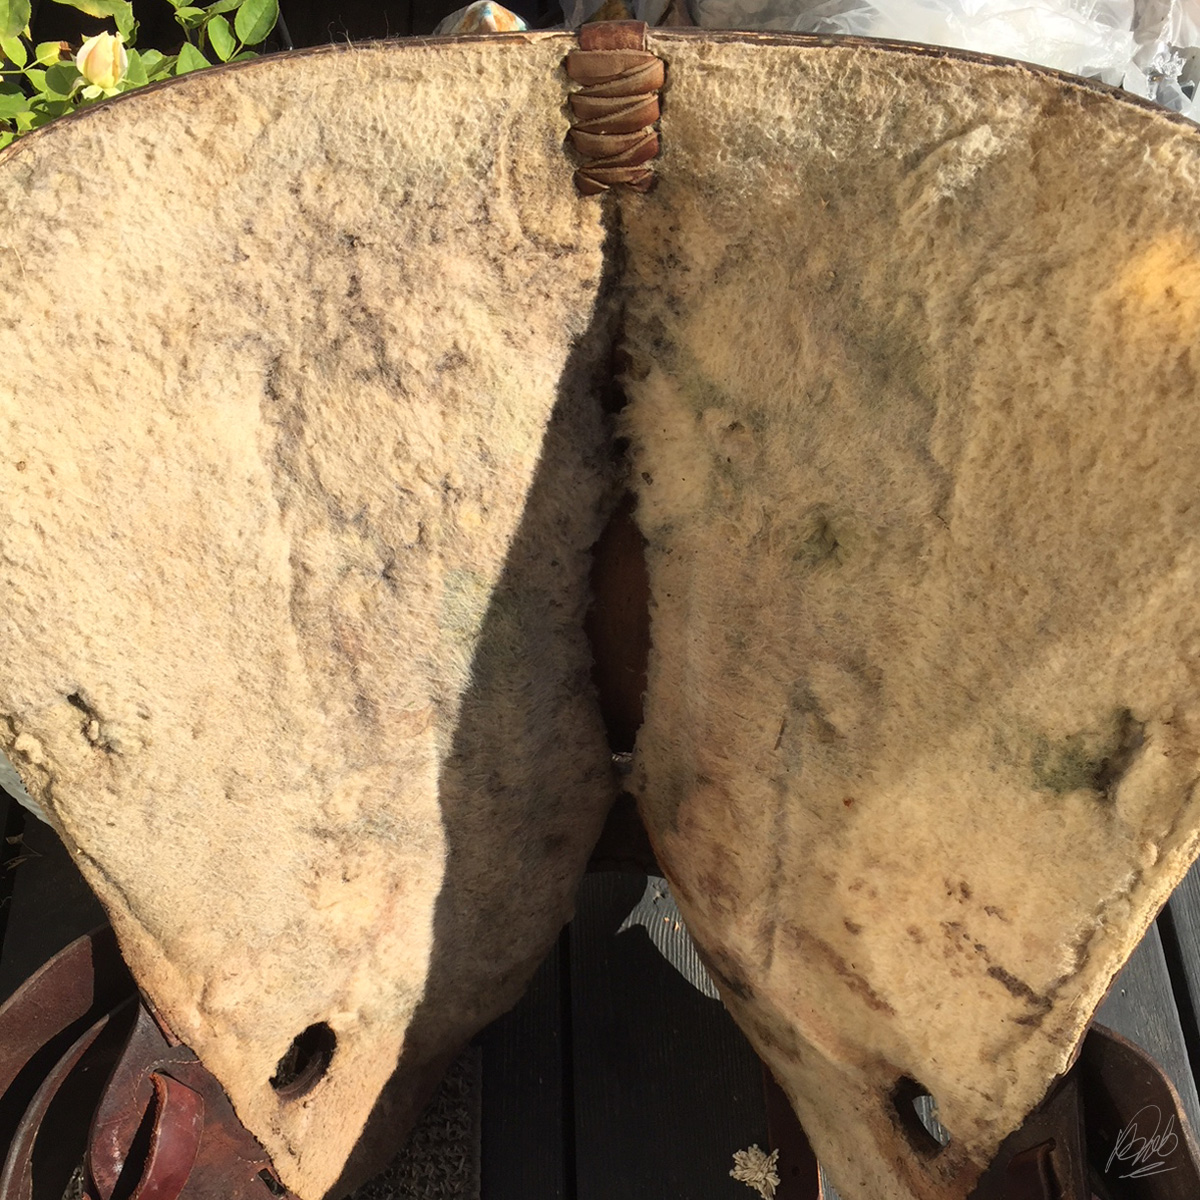
Betty's fleece has been packed down so hard for so long with so many different substances soaked in, it would not even scratch up fluffy with fingernails, and spraying with the hose alone did nothing to release it. The fleece was like hideous old carpet, and I was not completely sure it could be salvaged.

The synthetic fleece underneath actually photographed much better than it really was. It was matted hard to the tree and skirting, and saturated with mystery filth.
I ended up loosening the fleece with fingernails while the hose was directed at full blast, working in Dawn mixed with extremely diluted bleach to suds up and kill any cooties. This went extremely slow, inch by inch, until the fleece allowed the cleaning product to work all the way through.

Mud poured out of the fleece in frothy waves for several minutes. I probably rinsed through the fleece for 10-15 minutes afterwards to make sure there was no trace of product remaining.

Even with the nice summer weather, I knew it would take Betty a few days to completely dry underneath. Fortunately, I have a slatted saddle rack that would allow air flow to the fleece and still provide a horse-shaped form to prevent the skirts from warping as it dried.

I put Betty on the slatted rack in the shade to dry to avoid any further spotting and hardening of the leather. At night, Betty got covered up with a lightweight blanket to prevent dew from saturating the leather. Betty was tended like a pet parakeet, covered and uncovered.

Every day, for a several days, I'd take Betty off the rack periodically and rough up the fleece as it dried. I wanted to be sure the fleece would not compress against the slats, plus keep the air flowing all the way through.

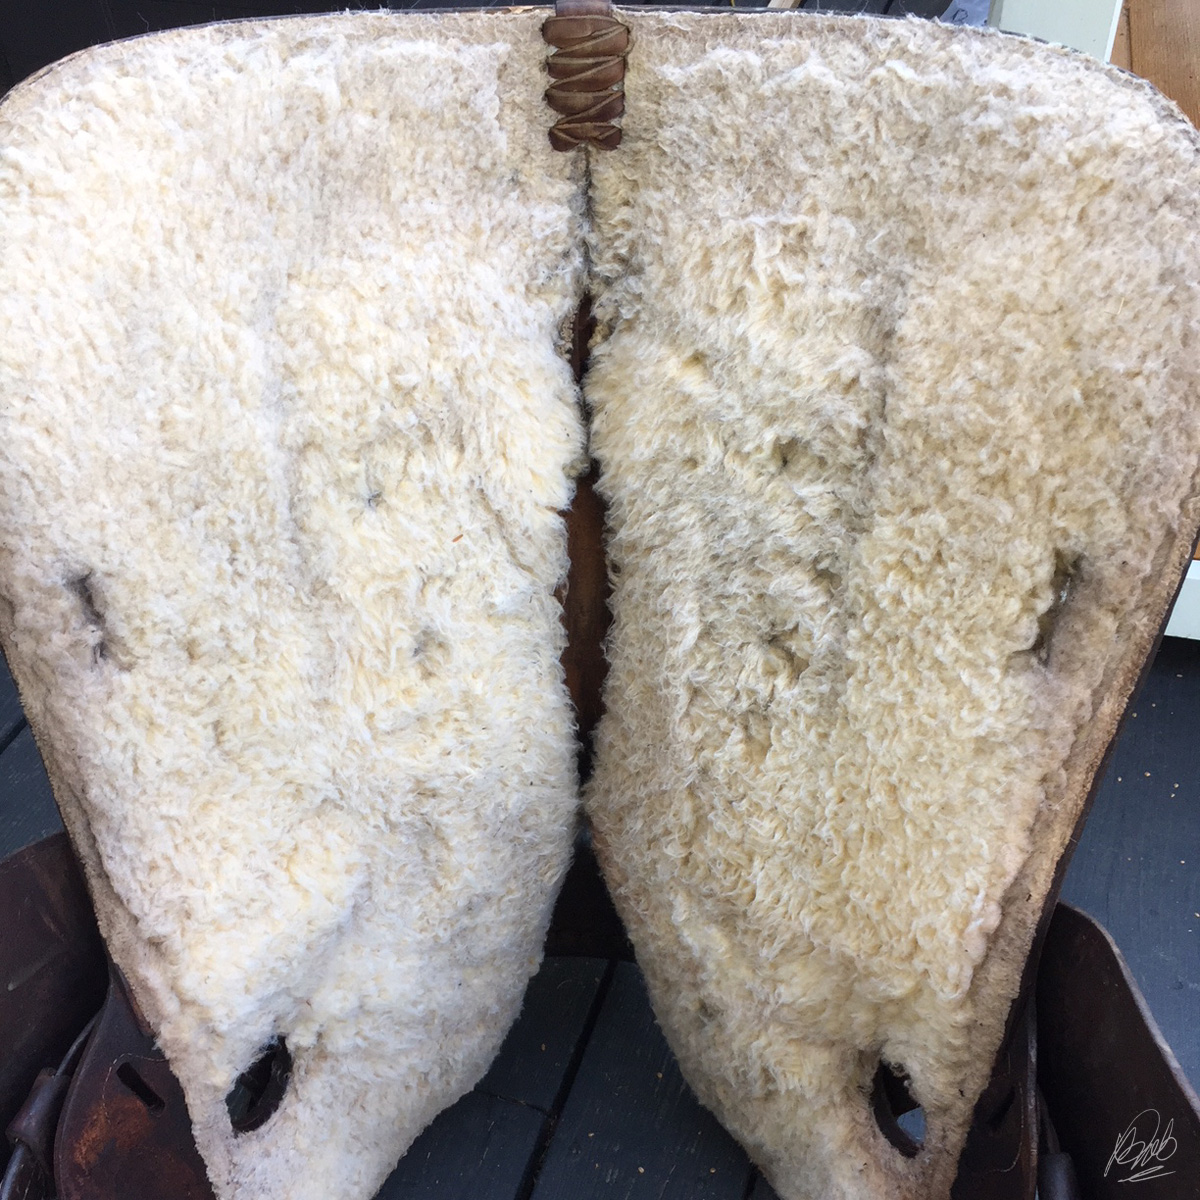
Betty's fleece looked, smelled, and felt remarkably better after a thorough shampoo and dry.
I feel the synthetic fleece has recovered enough to provide the protection it was intended. At some point it will need replacing, but the fleece on any western saddle isn't eternal. For now, Betty's undercarriage is looking fab!

Because the saddle leather is so filthy under that lacquered surface, cleaning each section has been an arduous task. First, water. Once it's good and wet, then carefully scrubbing with diluted Dawn and a very soft baby toothbrush. Only when the surface dirt is gone can I follow up with deglazer to remove the remaining lacquer, then attack all the dirt that was sealed under the lacquer.

A preview of things to come: the right rear skirts are mostly clean. Compare to the dirt-encrusted seat jockey area on the right.
Betty has a long way to go, but I'm delighted how she's responded to even nominal TLC. This is by no means a one or two day rehab, but her future looks brighter every day.

Betty will be a swan again.

Free Western Show Vest Pattern Download

June 12, 2018
•
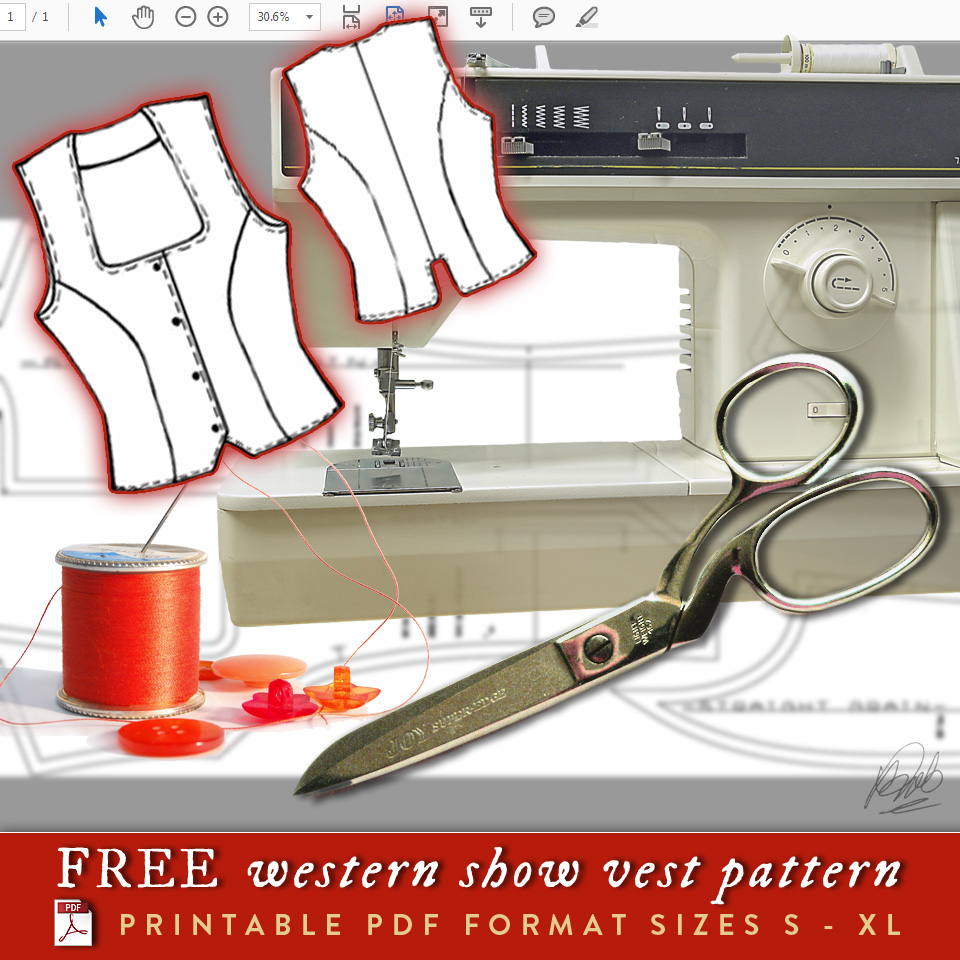
free western show vest printable pattern
Oh my gosh! On a casual drive-by at Pinterest, I happened upon a free lined western show vest sewing pattern at Modern Sewing Patterns too good not to share. Choose your size at the bottom of the page and download the PDF pattern for printing. (You'll also need to print the page of pattern instructions.)

The most awesome thing about this is it's a very contemporary pattern - the same basic pattern you've seen worn a thousand different ways in the show pen. Choose a luxury fabric, keep it classic or pile on the bling - it's all up to you. What this pattern offers is a great starting point for your own designs.

Sizes listed are Small through Extra Large, with a sizing chart. Modern Sewing offers instructions how to print their downloadable sewing patterns here.

So, fire up the printer, put a new needle in your machine and bust open your fabric stash. Sew moms and dads and all you show pen fashionistas, you have some sewing to do!

Crosby Equilibrium Refab, Part 2

May 29, 2018
•
dyeing saddle leather black
I decided to dye my vintage Crosby Equilibrium saddle black. I warmed up to the idea after refabbing a vintage Courbette Stylist that was originally black, but the color had faded. For a gal that lives life in a thousand shades of brown, I thought the rich, low gloss of the black Stylist was lovely.

There's a big difference between adding color back to a saddle that was originally black compared to one that was not. In one case, you're matching an existing color, where the leather was dyed through-and-through black. In the case of the brown Crosby, it was never anything close to black in its heyday. Most likely, the Crosby Equilibrium was originally London Tan or Newmarket, if the plasticy finish on the seat was any indication.

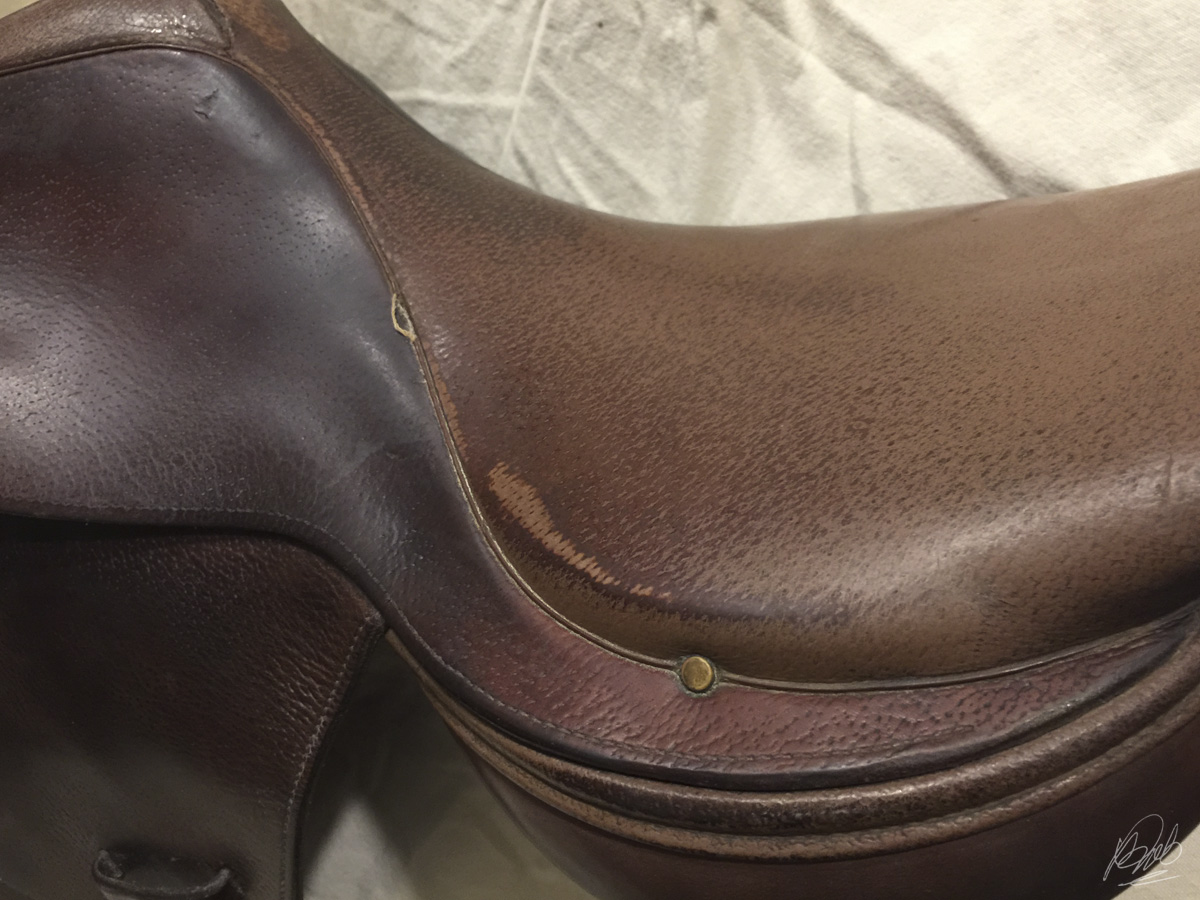
mystery coating over leather seat
Whatever coating Crosby used on some of their old seat leather, it was certainly durable. It laughs in the face of deglazer.
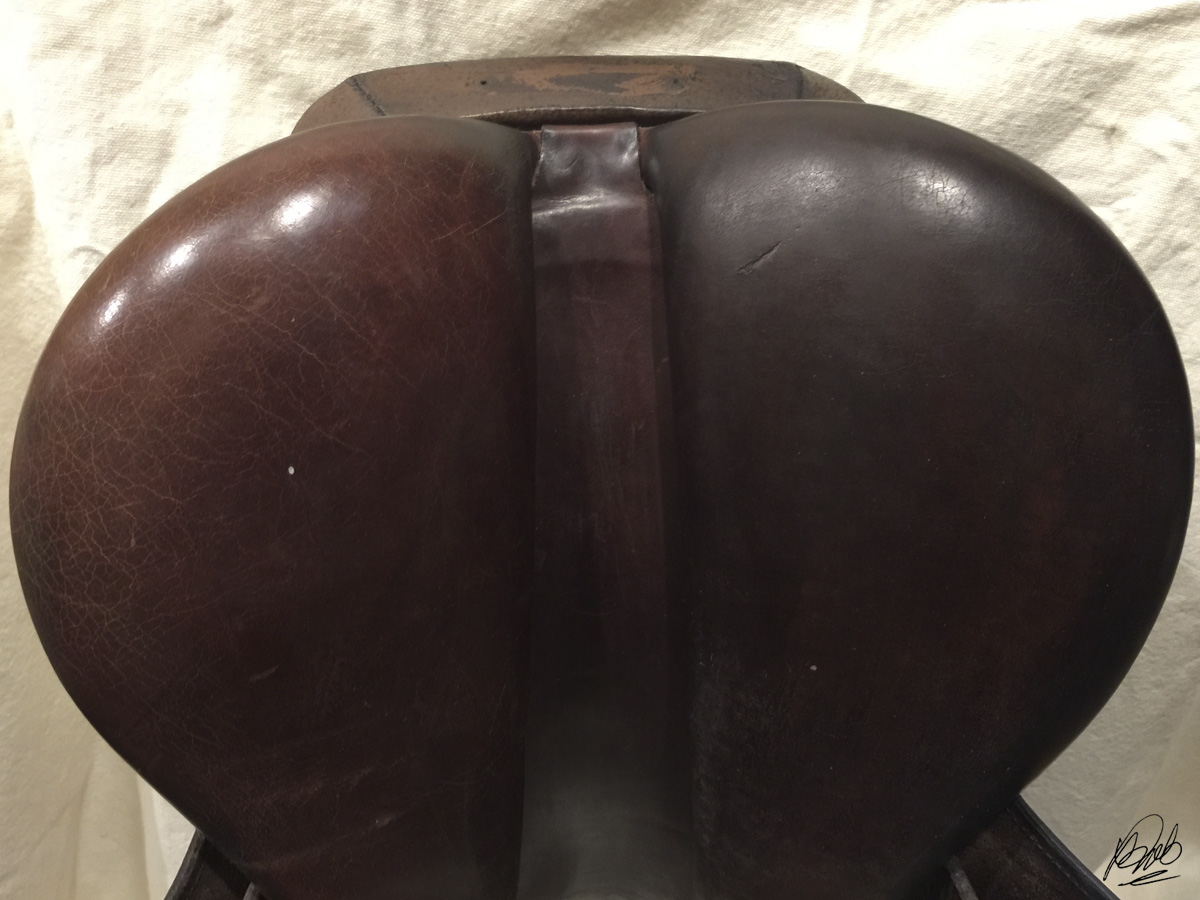
The Crosby had a mystery coating on the seat. It came from the factory that way. While some of the coating had rubbed away over the years, there were still large areas where the coating was very much intact. As for longevity, that stuff is practically bulletproof. As for aesthetics after 30-some years, it's dreadful. A traditional penetrating dye would not penetrate, so I had to find a coating that would cover the old completely but not rub off.

Hey, if Crosby did it during the Cretaceous period, why couldn't I?

Stripping the Old Finish

No matter if you're restoring an existing color with dye, or changing colors completely, the first step is to remove the old finish. The most common product for this is called deglazer, made especially for smooth leather. Deglazer also dissolves old coatings, soaps and oils that would inhibit dye from penetrating evenly.

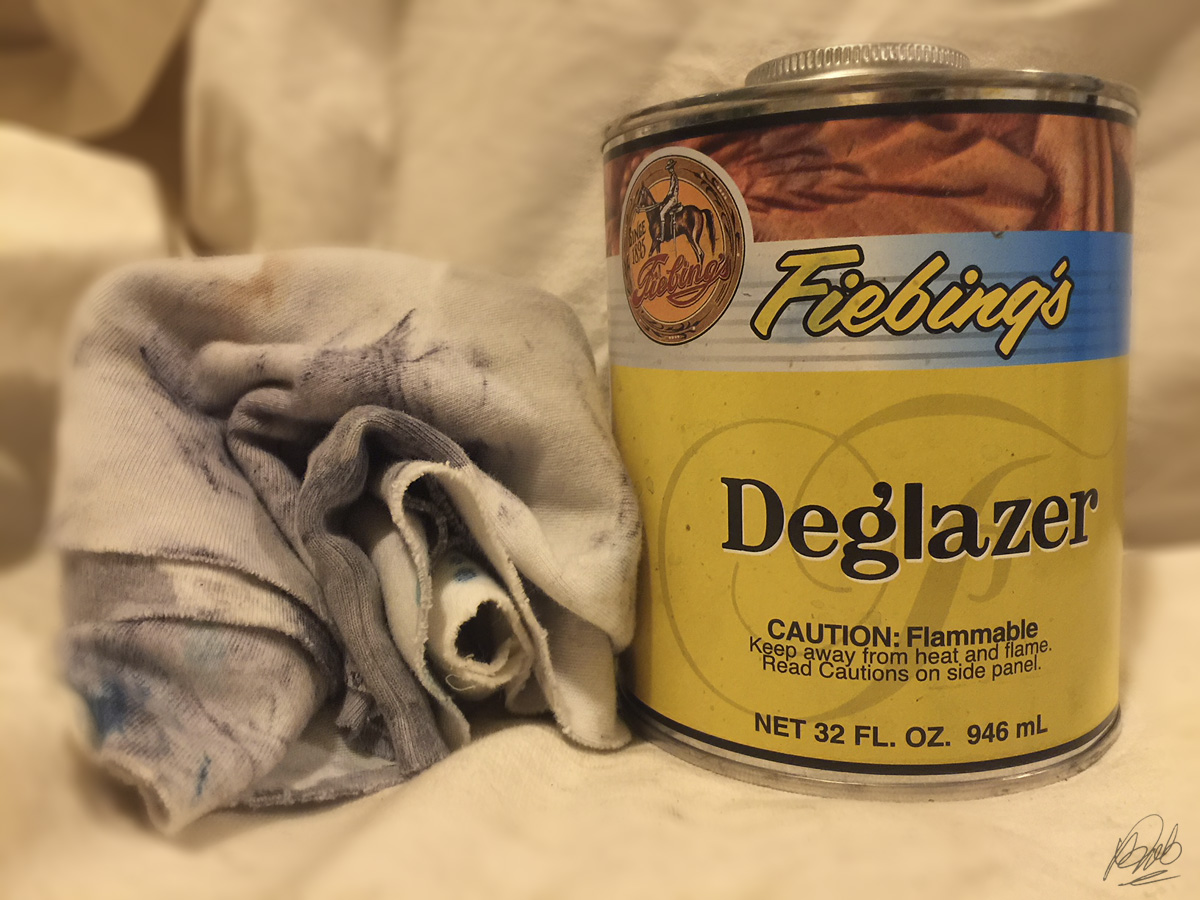
Fiebing's Deglazer with natural cotton rag
I apply Fiebing's Deglazer with a pure cotton rag. I purchase the larger economy size, but it's also available in 4 ounce bottles for smaller projects.
I use a lot of deglazer. By that, I mean I use it, then use it some more. I give everything a thorough rubdown with a nappy microfiber cloth in between deglazer applications to eliminate any hidden buildup of deglazer residue. That said, microfiber cloths are synthetic, and should not be used anywhere deglazer is still wet and active, or they may literally melt.

Especially in areas under the stirrup leathers or a seat that's been worn smooth from hard use, I use deglazer to open up leather fibers that have become compressed/tight/smooth and consequently more difficult to dye. Those areas typically take a few applications of deglazer.

deglazed saddle leather
A couple more sessions with deglazer, and it looks like a huge mistake that can never be salvaged.
Once the leather is stripped, dry and parched looking from deglazer, the fun starts. Or tears, depending.

Base Coat of Black with Vinegaroon

Before dyeing, I wanted to put down a base color of "black" using using vinegaroon. Vinegaroon works by reacting with the natural tannins in the leather, turning the leather darker. Ideally, it turns the leather black, but results vary from gray to dark brown to black depending on the type of leather, the original leather color, the strength of the vinegaroon, and how completely the vinegaroon can penetrate. One of the biggest benefits of vinegaroon over traditional dyes is it colors the leather from the inside out, meaning it's permanent and does not rub off.


Frankly, vinegaroon works best on untreated, natural leather, or leather that was black to begin with. Old saddle leather isn't always the best candidate for vinegaroon because it may already contain dyes and oils that prevent a complete color change. I had removed so much of the old finish on the Crosby with deglazer I felt vinegaroon could deepen my target true black color. I did not expect it to turn black with vinegaroon alone.

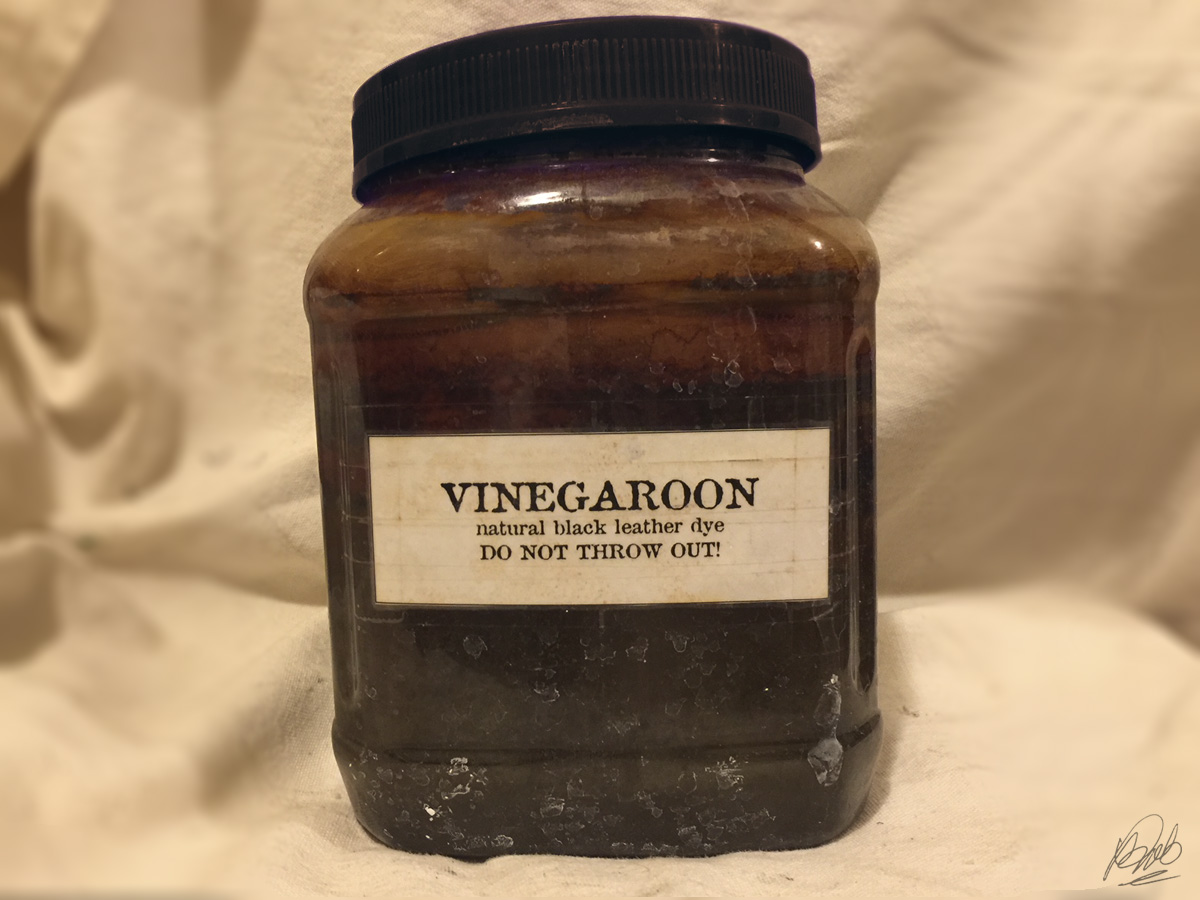
vinegaroon in plastic jug
I keep homemade vinegaroon under the sink with a little disclaimer not to throw out, despite its nasty appearance!
I applied the vinegaroon with an old cotton T shirt, working in small circles and rubbing in completely. The color change only takes a few minutes, so you can see lighter areas that might need another application.

saddle panel treated with vinegaroon
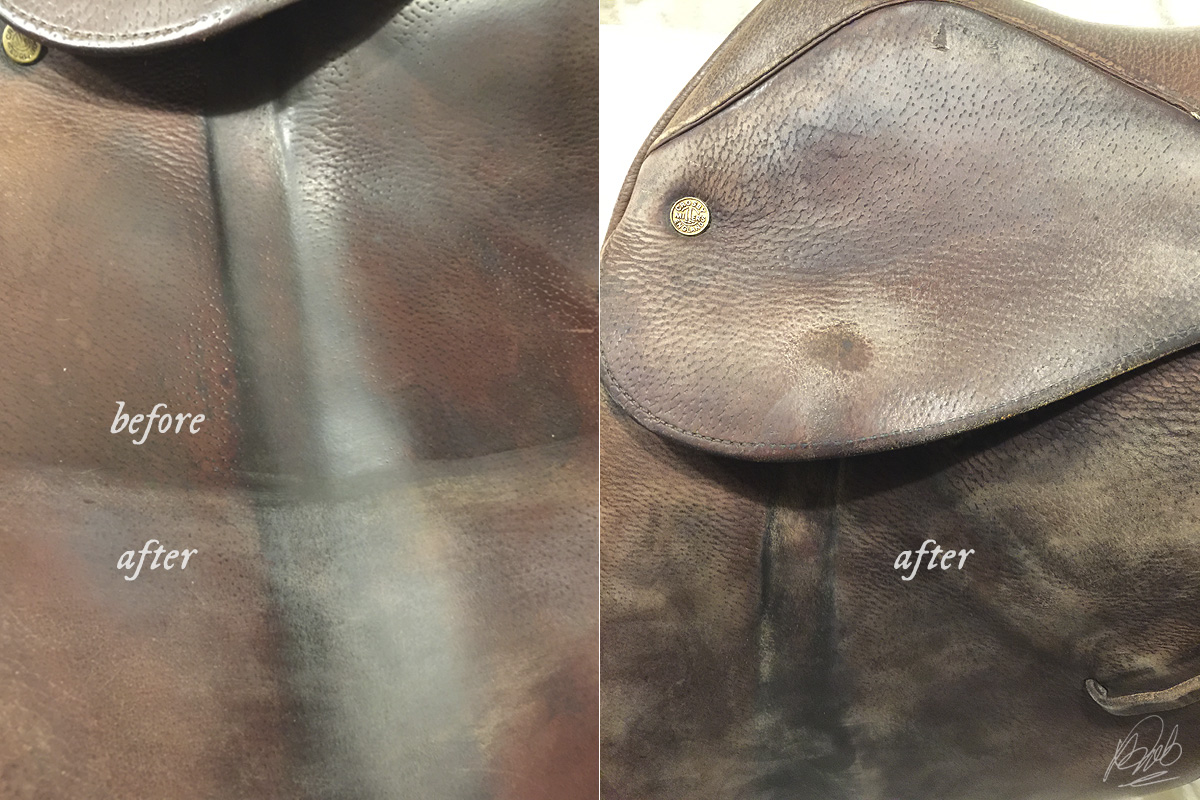
Left panel deglazed only. Right panel deglazed, then darkened with first application of vinegaroon.

vinegaroon applied to saddle flaps
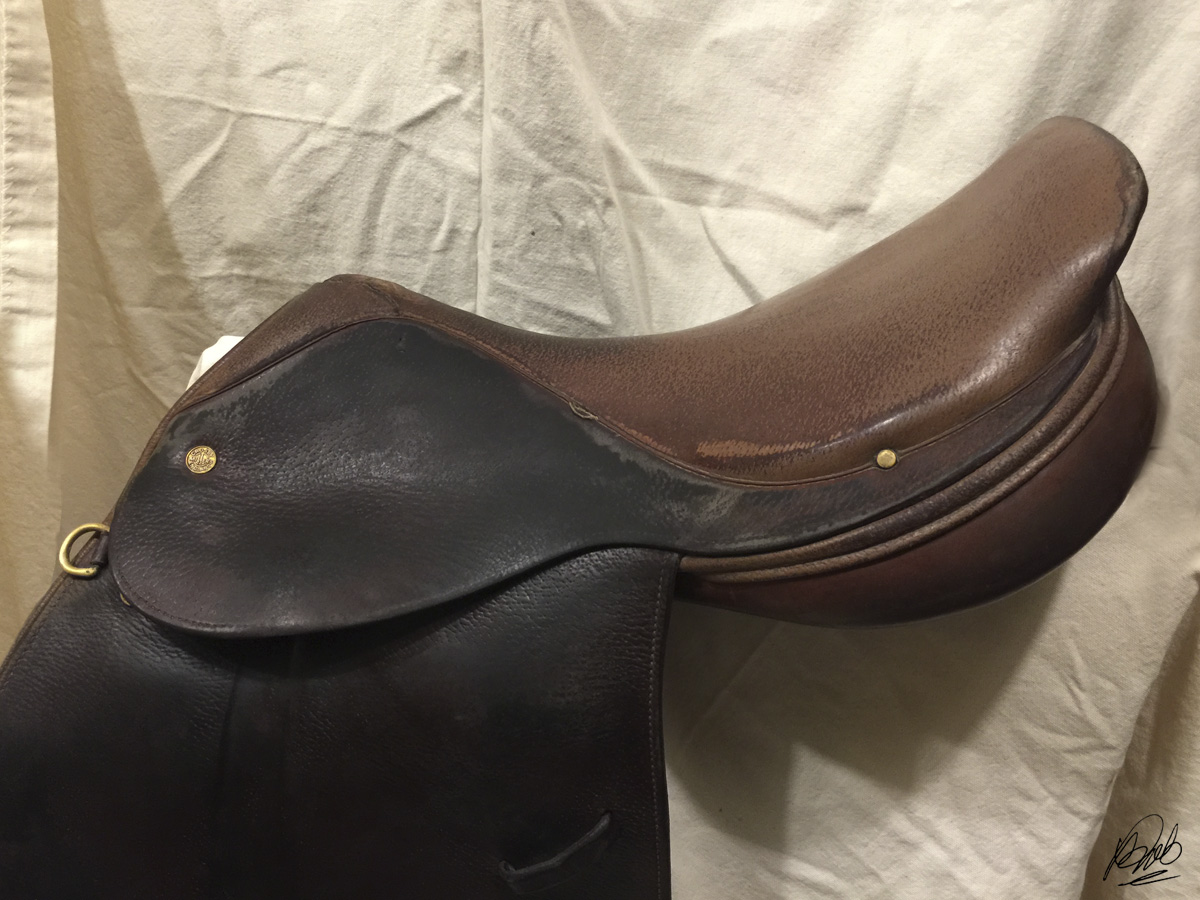
As a base for blackest blacks, vinegaroon is the bomb! The color change with vinegaroon only takes a matter of minutes. The flaps and skirts accepted the color change well, but the seat was impervious to any color change whatsoever.
After 3 coats of vinegaroon I achieved maximum color change. After that, a fourth coat did not offer any darker/blacker color.

Eventually, the vinegaroon turned the a fairly uniform near-black color. This would have taken several days and coats of traditional black dye to accomplish, with all kinds of buildup that would inevitably result in years and years of rub-off.

Neutralize After Vinegaroon

After the final application of vinegaroon everything gets bathed in a solution of baking soda dissolved in water to neutralize the vinegar chemical action and reduce the offensive vinegar odor. Afterwards, rinse, rinse, and rinse some more with clean water.

With the vinegaroon neutralized and the leather rinsed clean, I left the saddle to dry completely 24 hours before going to the chemical leather dye step.

Headsup! Steaming & Shaping Your Western Cowboy Hat

May 21, 2018
•
steaming and shaping western hat

I made a quick 'n' dirty appearance at a local Pinto show with my mom's 2 year old colt as a low-key schooling experience, and lived to tell the tale. Actually, he handled himself like a champ, so all went well.

But... that meant I had to pull some show clothes out of mothballs, including a new western hat waiting to make its debut.

About a thousand years ago, I worked at a tack store and used to shape hats for people. Those skills have been lost in the sands of time, and anymore I'm about as adept shaping hats as a sea bass. For one, I don't have a hat steamer, and two, I flat forgot how.

Fortunately, The Hat Lady was on the grounds, and she expertly transformed my hat to show-ready in a matter of minutes. Thank goodness for small favors, right? Even though the colt and I fairly decimated the in-hand trail course, my hat looked top notch.

If you never knew how to steam and shape a western cowboy hat, or forgot, all kinds of hat pros have shared their hat-shaping secrets on YouTube. Here's a basic primer from the Boot Barn that can be applied any western hat:


Sean Ryon shapes a straw hat (beginning at 4:34):


Big R takes their hat game to next level, including trimming the brim of a felt Stetson, and adding eyelets:


Which brings me to the elephant in the room: the pros use hat steamers. I suppose a really experienced hat shaper could get good results with just about anything, but their weapon of choice certainly appears to be a genuine hat steamer.

Palm leaf hats are a critter all their own - they can be shaped with only water!


I don't think I'm ready to give up a nice felt for a palm leaf yet, just for the convenience of shaping it from the sink. A little more searching lead to alternative ways to shape a palm leaf.


Well, that's all well and good, but I still own exactly zero palm leaf hats, while my closet is teeming with western felt hats, all needing some attention.

So, how much is a hat steamer, and is it worth it to shape your own hats? The DIY part of me says maybe it's practical, especially if you have several hats or show regularly. One could even argue that the convenience of having your own hat steamer might encourage better and more regular hat care, since they truly are investment pieces in your show wardrobe.

The more cautious side of me asks why buy an expensive gadget just to ruin a perfectly good hat, when a professional can do it quickly, inexpensively, and deliver great results? Then again, I'm not known for being cautious. Give me a Sharpie, X-acto knife and a miter saw, and I'm game for anything.

If one was so inclined, had the wherewithall, and was willing to sacrifice a few hats in the learning process, the entry level Jiffy Hat Steamer runs somewhere in the $150 range. The larger professional version adds about $100 to the price. In 10 hats or less, the smaller unit could pay for itself... if you didn't ruin any in the process.

Who's up for shaping their own hats?

Crosby Equilibrium Refab, Part 1

May 15, 2018
•
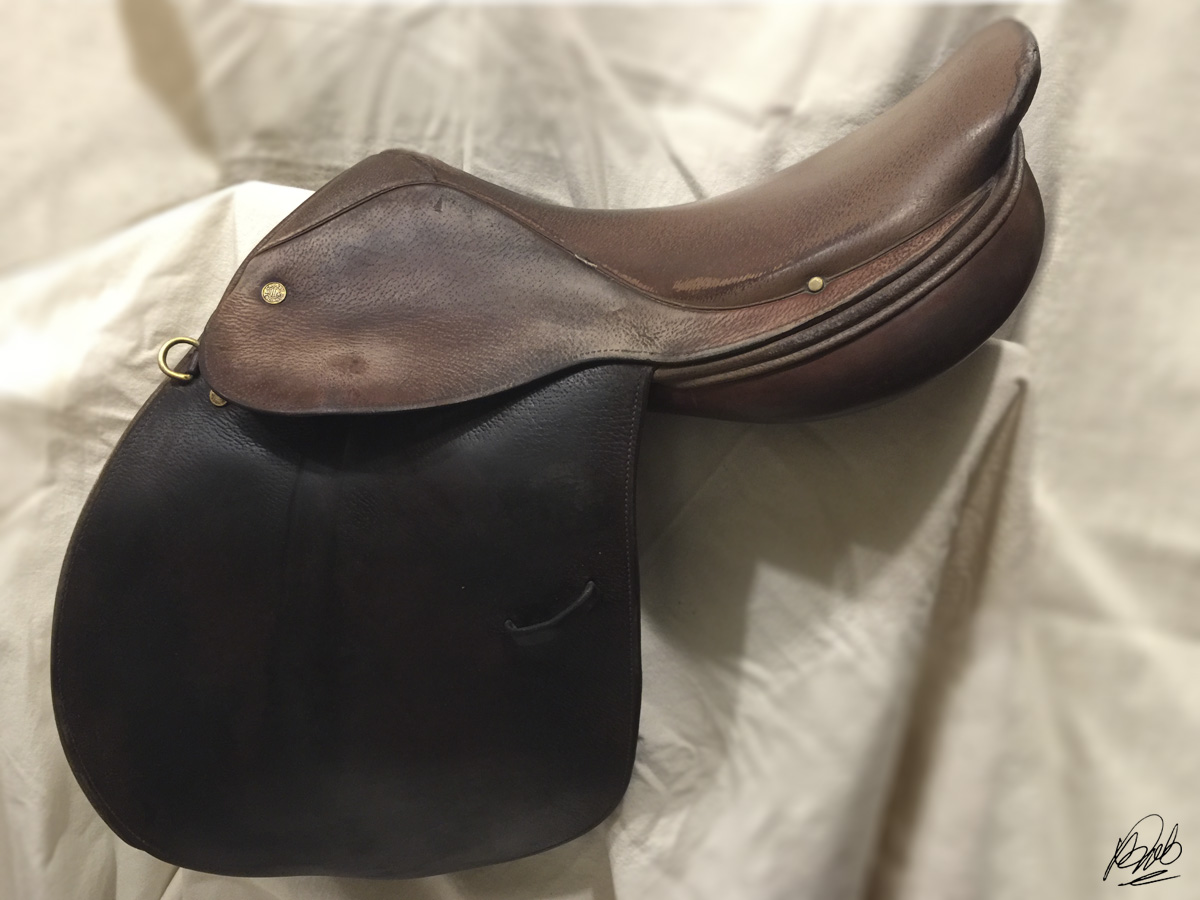
Crosby Tad Coffin Equilibrium
Mark this off my bucket list, I scored a vintage Crosby Tad Coffin Equilibrium. A battle-scarred, well-loved veteran, this little vixen needs some TLC.
In the late 80s [Tad Coffin] developed another best seller for Millers, the Equilibrium close contact saddle, also manufactured by Crosby. - https://www.tadcoffinsaddles.com/about/
Unlike so many old Crosbys, this invocation of the Equilibrium featured flatter, wider panels and shorter points on the tree, so while the channel isn't considered wide, even the medium tree fits a surprising range of horses. Indeed, it's one of those saddles that "fits just about anything you put it on."

There were several variations to the Equilibrium over the years. Some had no knee roll, some had padded flaps and a pencil roll, some had extended flaps. Mine has the standard flap, a small knee block and no knee roll, which is what I was looking for.

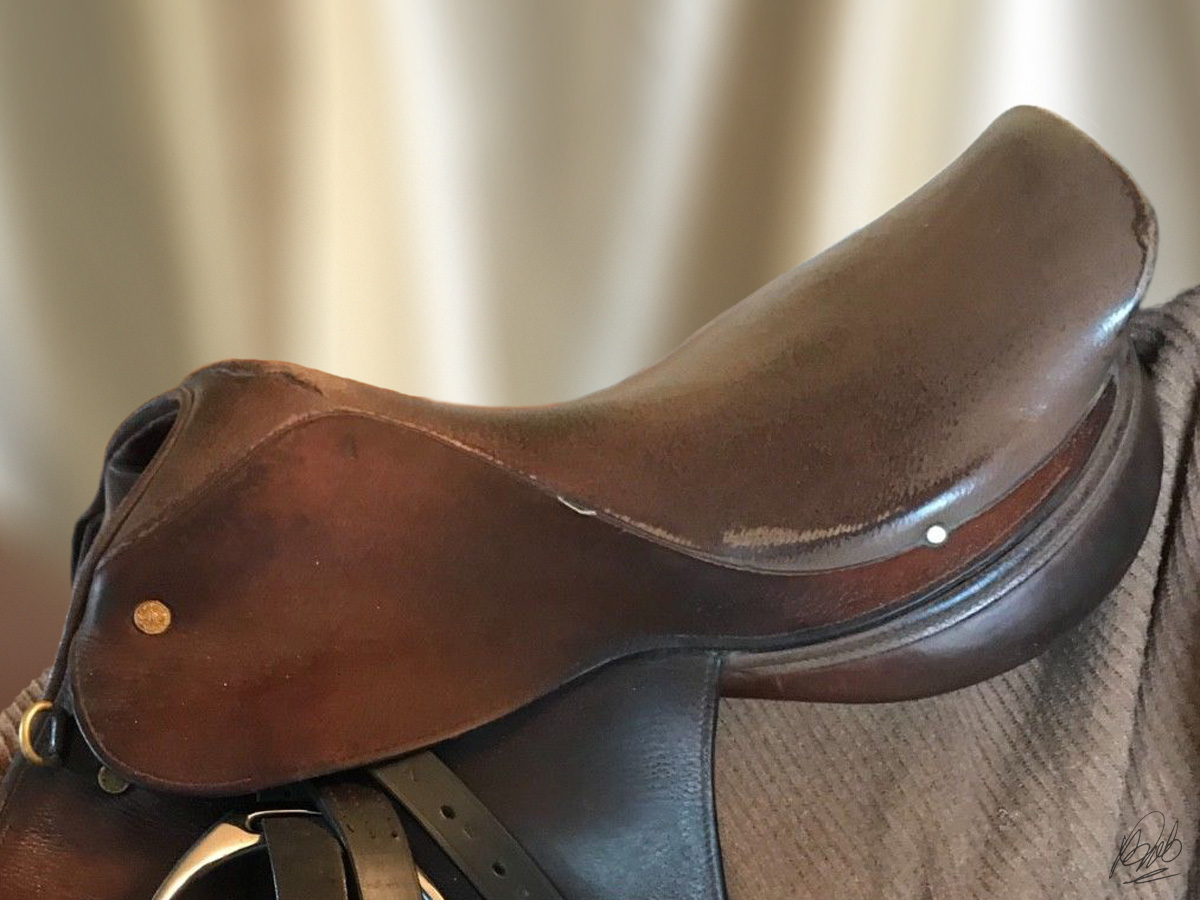
While the seat isn't particularly deep, it's very comfortable. It features the sickly, flesh-colored coating found on many old Crosbys.
While the seat isn't particularly deep, it's wider, slightly padded, with a narrow twist, making it infinitely more comfortable for fat bums like mine. Compared to the narrow, rock-hard, banana seats of many vintage close contact saddles, the Equilibrium (Eq) is a slice of heaven. While it might not satisfy a masochistic purist hailing from the Iron Butt Reitschule (Nein! Nein! Nein! We didn't need padded seats! We didn't have knee rolls!) that were berated mercilessly by their trainers whilst bleeding from their knees, I like it.

I'm old. I've already bled from the knees. I wear reading glasses and have arthritis. I'm over a lot of that purist shit where a minimal level of comfort is preferable.

I really don't know how old this Crosby is, but it is stamped on the underpanel: 3 5 3373. Anymore, I don't know where to find reliable information on the older Crosbys online. Maybe a crusty old saddler from Walsall would know.

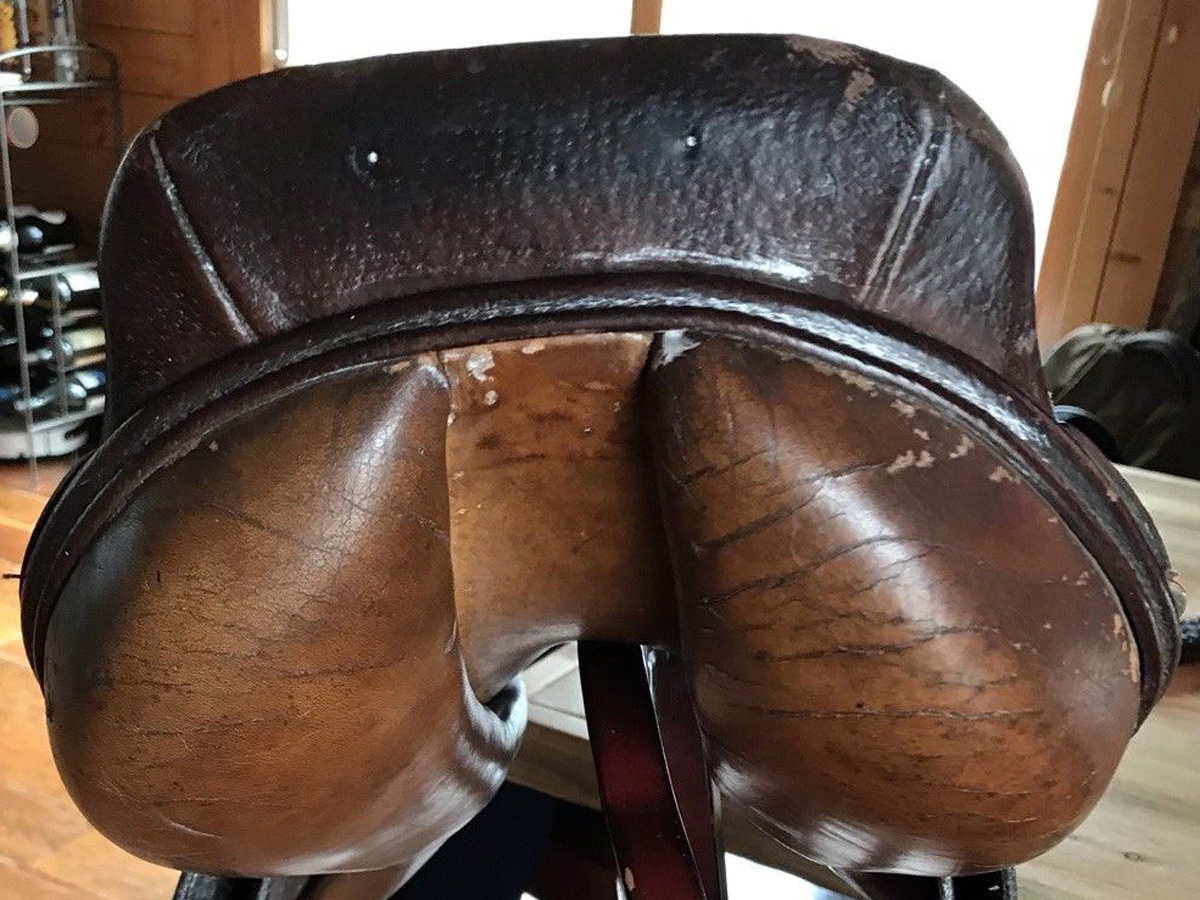
While I wouldn't say this saddle was babied over the years, it wasn't neglected to the point it's unsalvageable and a bunch of expensive things need replacement. The leather quality is what you would expect from an old Crosby. There's a subtle grain on the flaps, the panels are smooth and uniform, but this critter did not suffer a lot of the cracking often seen on Crosby panels and seats. In fact, its panels are soft as butter.

cracked Crosby panels
You will find a lot of Crosbys have cracked panels (above). The panels on my Equilibrium are still soft and smooth. Photo: Google images
The seat, unfortunately, was the typical faux pigskin grain with some impregnated coating that turns a sickly pallor over the years. That coating protected the seat from wear, but forms a nearly impenetrable layer that thwarts efforts to re-dye or restore with the usual arsenal of leather treatments.

At some point, the seat either split or was damaged near the pommel, and was glued down to prevent further tearing. While it's unattractive and affects its resale value, it's a very secure repair that isn't going to deteriorate or affect its usefulness. It's also in a location it won't be felt while riding unless you're offloading, headfirst. Personally, I'm meh about the repair, though YMMV.

damaged pommel repair
Frankenpommel, I still love you.
What does my Crosby Equilibrium need to be fit and foxy again?
    1. Left panel re-attached to the underpanel
    2. Could use new billets in the near future, okay as is
    3. Deglazer to completely remove old finish
    4. Re-dye with stable, rub-proof, color

Number 4 is a kicker. With the weird coating on the seat, it's going to require another similar coating to completely cover, yet remain stable. Stable, as in: I don't want dye to rub off on my breeches/jeans/rear end for the next five years. I don't want the finish to peel and erode to show the original coating color underneath. I'll probably have to experiment a little bit to find something close to bulletproof.

I like to call that "guessing."

If you assume all the best leatherworkers share such information, think again. If you go to your local Tandy store, chances are nobody's going to know what you're even talking about, let alone have any problem solvers you can purchase. The hardtimers that could probably offer real advice guard their trade secrets like Colonel Sanders. Others will straight up tell you it can't be done before you even finish sharing the details of what you're attempting.

Saddle makers. Capriola Saddlery, Elko, Nevada
These guys? Probably not going to tell you how to fix coated Crosby seat leather.
These people want to kill your dreams. I like to call them Dreamkillers.

They're cranky and stubborn and apathetic and don't give a rat's ass about your old, unfashionable, near-worthless English saddle you want to dye [enter color name].

Piss on 'em.

Make your own path.

Follow your own star.

Dare to fail spectacularly.

I didn't learn what I know because I was deterred by people who told me I was unqualified to try it, much less do it. I learned by trying, doing, and sometimes failing. For any newbies that are easily discouraged, don't let those grumpy old farts scare you. (Besides, they ain't so tough when you rub Bengay in their eyes.//)

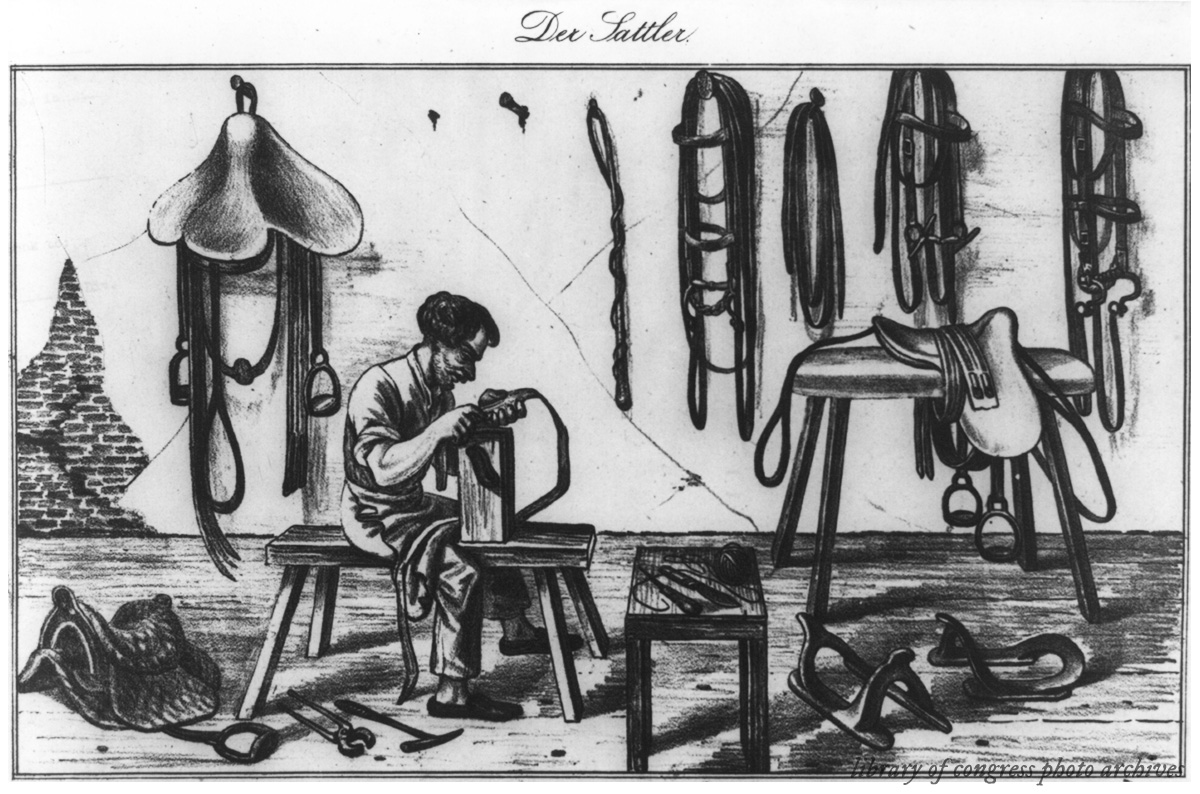
Der Sattler
This grumpy old German guy isn't going to spill his guts, either. Seriously, you're on your own.
The seat on that Crosby is going to be dyed.

As far as the flaps and panels go, those are not coated, but they are a very tight-grained leather. Typically, once the flaps have worn smooth, it's hard to get dye to penetrate uniformly because the grain is more like glass than leather. Because it's difficult to get the dye to penetrate, you can expect a lot of rub-off with most go-to leather dyes.

For the record, nobody likes rub-off. Rub-off: ick, bluck, nasty, undesirable.

What about just oiling it darker? To make for an even color, it'll take a bucket of oil, and then I'm left with a splotchy, greasy, limp saddle. No, my plans for this very traditional saddle are less conventional.

I'm dyeing this baby black.

Yes, a black hunter/jumper saddle. An old-as-dirt, not fashionable, not French, not expensive, H/J saddle.

But, but, but… judges won't like it! Nobody rides HUS in black saddles! Ummm... who cares? If I was a player showing at Devon or the Wellington winter circuit, maybe that would be a consideration. And even if I was, so what? (Maybe that would make me a trendsetter.) Hey, if heels up and heads down and posting to the canter doesn't bother anyone, I don't think a black H/J saddle is any kind of deal killer for my piddling around in old folks' ammy equitation classes.

Black it shall be.

Oil-Based vs. Alcohol-Based Leather Dyes

April 23, 2018
•

Just a quickie comparison illustrating how different dyes work on old saddle leather.

Sometimes old saddle leather is like mystery meat. Vegetable tanned, drum dyed, natural, calfskin, top grain, aniline, bonded, coated - sometimes it comes down to your best guess what you're really working with.

My go-to dye on older leather is Fiebing's Professional Oil Dye. I find it penetrates mature leather better and therefore the color is more evenly saturated. Because it penetrates older leather well, rub-off is reduced.

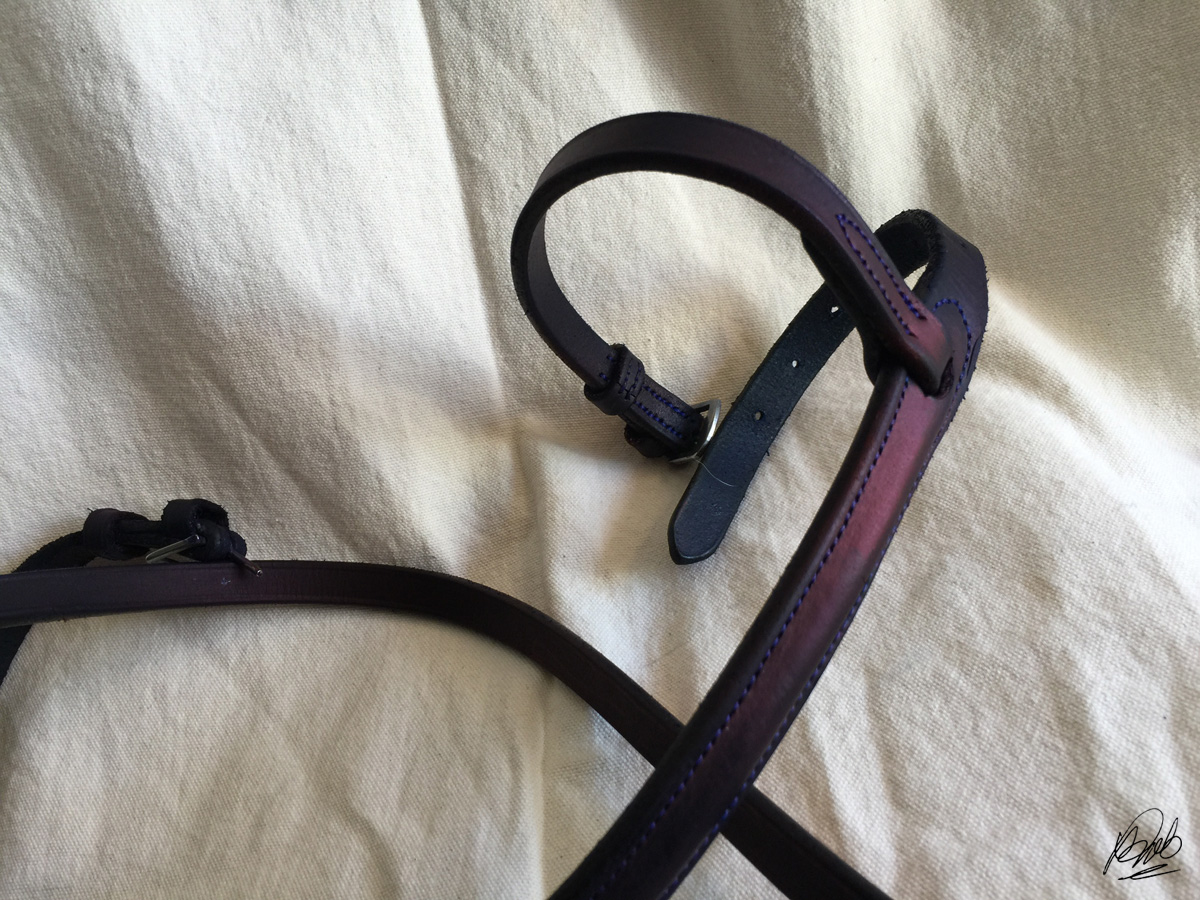
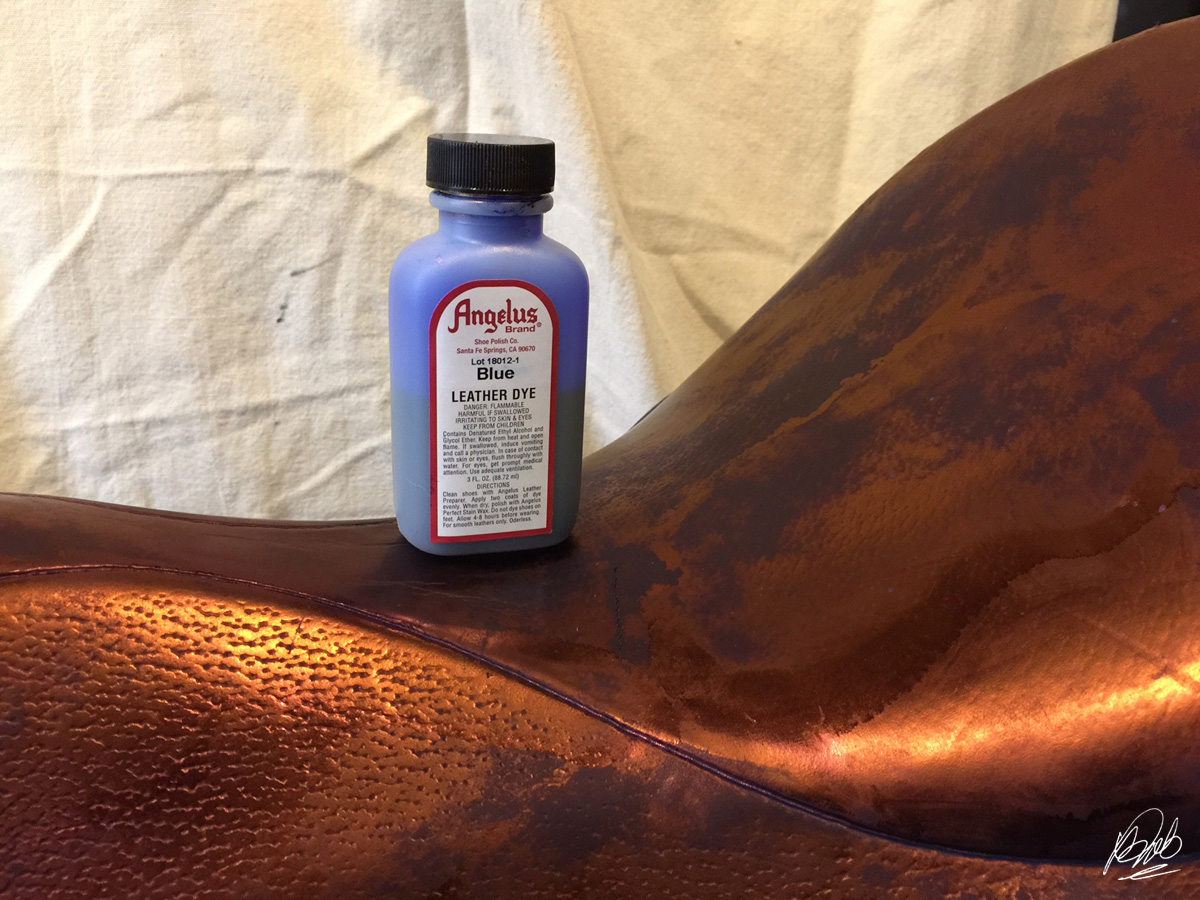
The biggest reason I don't use alcohol-based Fiebing's dye is the weird colors that show on the dyed surface. You get some greens, purples, blues… almost like oil droplets on the surface of water. These tend to build up crusty residues with heavier applications, with disappointing results. As the crusty colors build up, it seems to penetrate less and the intended color becomes more askew.

After applying regular Lincoln Shoe Dye in Navy (alchohol-based) on very light colored English bridle leather cavesson prepped with deglazer. Notice some maroon and metallic bronze highlights and other undesirable color characteristics. Definitely not navy blue, at least on the surface.

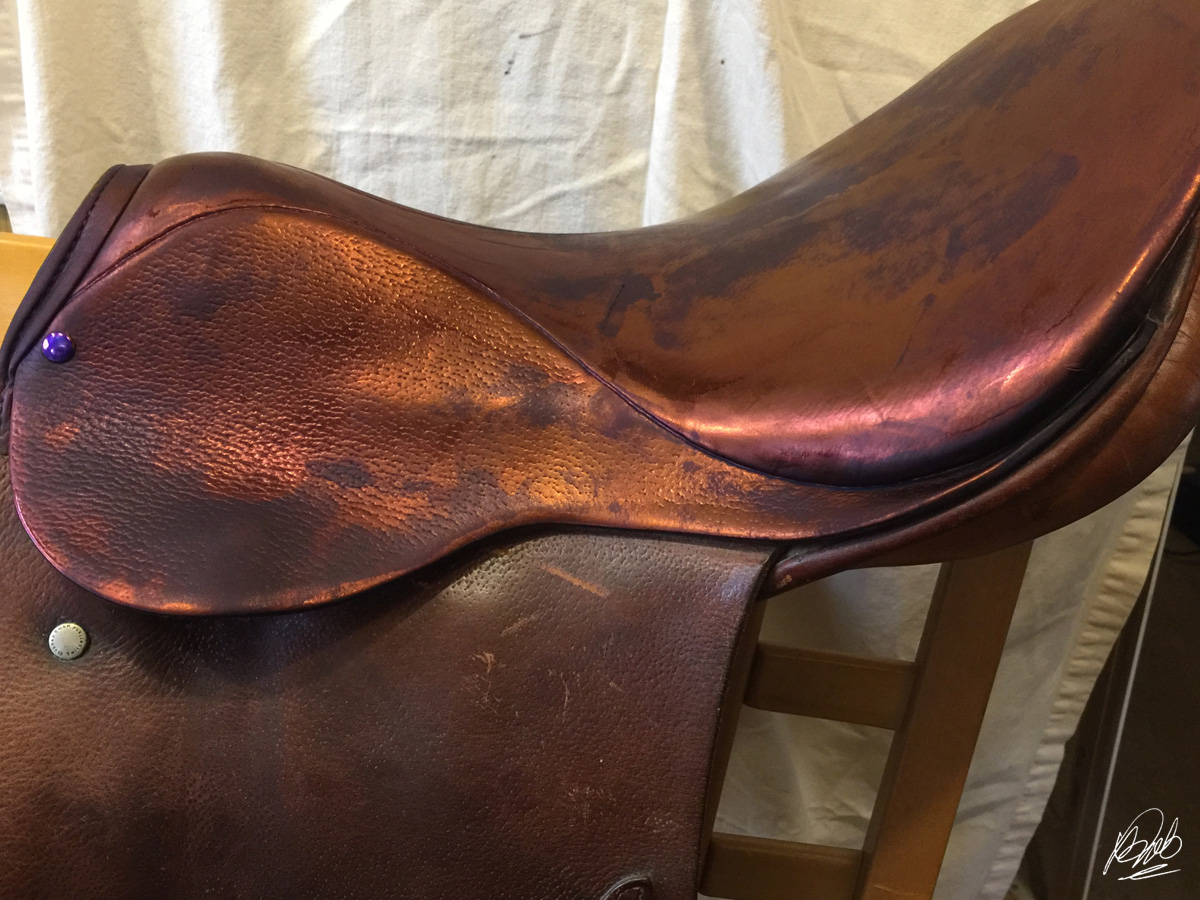
This saddle glows like radioactive waste after prepping with deglazer and application of alchohol-based dye. The multicolored surface had to be wiped down with deglazer to remove the color effects, then re-dyed with oil-based dye.
Alcohol-based dyes tend to leave the leather very dry and stiff, worse with each coat. This is particularly problematic when working with older leather, since it may already be compromised. I don't find this to be the case with oil-based dyes. I've found that on some pieces of older leather, it actually becomes softer and better conditioned after using oil-based dye.

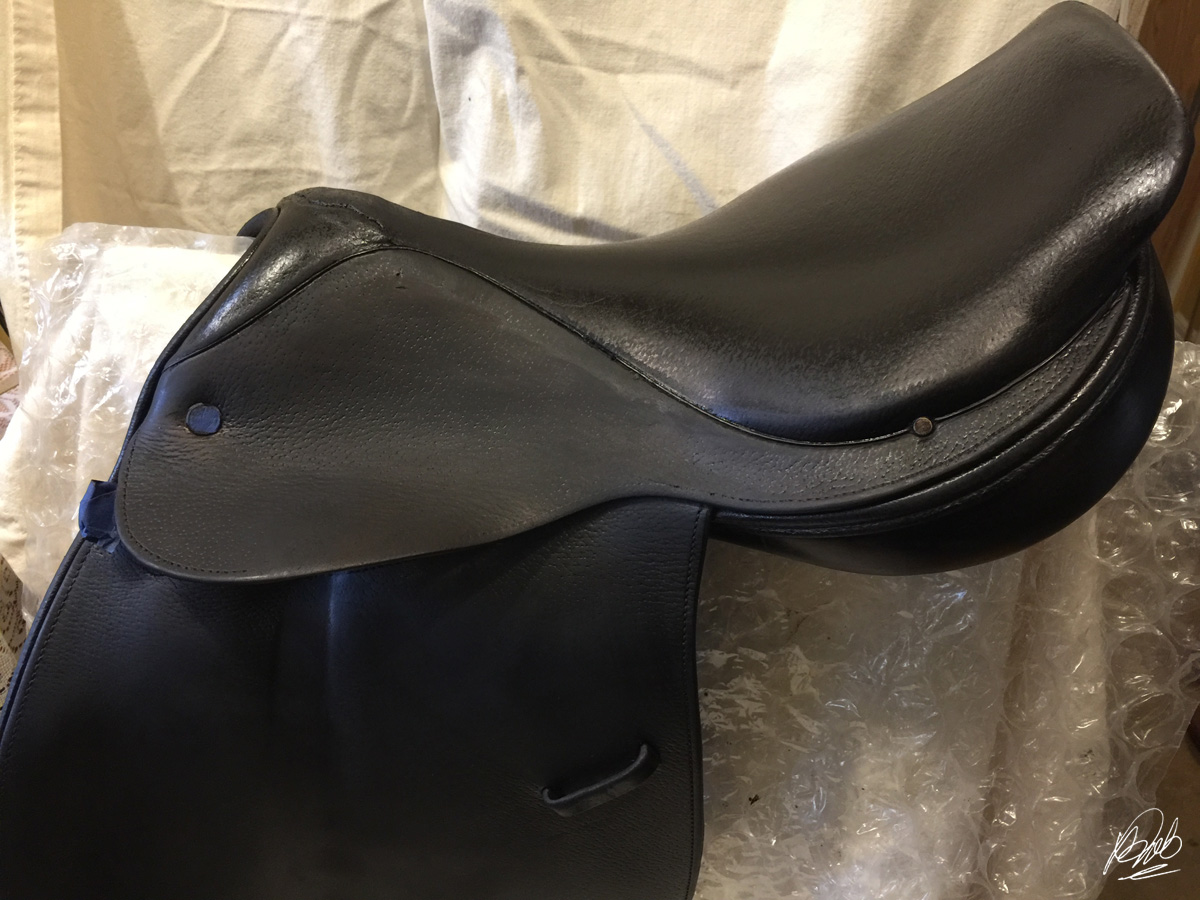
Deglazed older Crosby saddle after applying the first coat of regular Fiebing's Professional Oil Dye in Black (oil-based). Notice the pure black color without the unwelcome tints. The blue highlights are actually from the reflection of my roll of painter's tape, which I used to mask off the hardware before dyeing.
Quite simply, I avoid alcohol-based leather dye for my projects. Other people may rave about it, swear by it, love it, and that's fine by me, but I prefer oil-based dyes for saddle-type leather because it gives me consistently better results.
 

My Instagram

Copyright © The Brown Rider. Custom template by OddThemes